Material guide
How to Pick Nozzle Size for Variable Diameter Filament
From planning to printing
Find material for your next print
Compare current colors, prices, and setup requirements before choosing a spool for your project.
Share this guide
Get the article link

Last Updated: November 1, 2026
Quick Summary
Pick your nozzle size from the smallest filament diameter you measure, not the nominal label, so flow keeps margin at the tightest point. Measure at least ten points with calipers, then stay at 0.4 mm or larger when the minimum drifts low.
- Measure filament at ten or more points, taking two readings per point rotated 90 degrees to catch ovality.
- LineBoss Filament spools are specified at plus or minus 0.02 mm diameter tolerance.
- If the measured minimum stays above roughly 1.70 mm, stay at 0.4 mm or larger.
- If the minimum drifts below roughly 1.70 mm, size up and avoid 0.2 to 0.3 mm nozzles.
- Enter the measured average diameter in the slicer, then verify flow with a calibration print.
Table of Contents
- Why Nozzle Size Matters More With Variable Diameter Filament
- How to Measure Filament Diameter Before You Choose a Nozzle
- Filament Diameter Tolerance and What It Means for Your Nozzle
- A Practical Nozzle Selection Rule Based on Minimum Filament Diameter
- 0.4 mm Nozzle Layer Height and Line Width Settings for Nonuniform Filament
- Slicer and Firmware Setup for Variable Diameter Filament
- 3D Printer Under-Extrusion Troubleshooting When Diameter Drifts
- Test and Calibrate Before You Commit a Spool
- Frequently Asked Questions
Why Nozzle Size Matters More With Variable Diameter Filament
Nozzle size for variable diameter filament is a matching problem, not a preference. A spool that drifts above and below its nominal diameter changes how much plastic reaches the melt zone.
Most nozzle guides assume every spool is identical. That assumption breaks down the moment a filament's actual diameter wanders.
The core idea: the nozzle sets the ceiling on line width and layer height, while the filament sets how much material actually arrives.
- Nominal diameter is the labeled size, such as 1.75 mm.
- Actual diameter is what your calipers read at several points.
- Tolerance is the allowed spread around nominal.
- Variable diameter means that spread is wide enough to affect flow.
How to Measure Filament Diameter Before You Choose a Nozzle
Measure filament diameter with calipers at several points along the spool, then use the smallest reading to guide nozzle choice. One reading is not enough, since filament varies along its length and between spools.
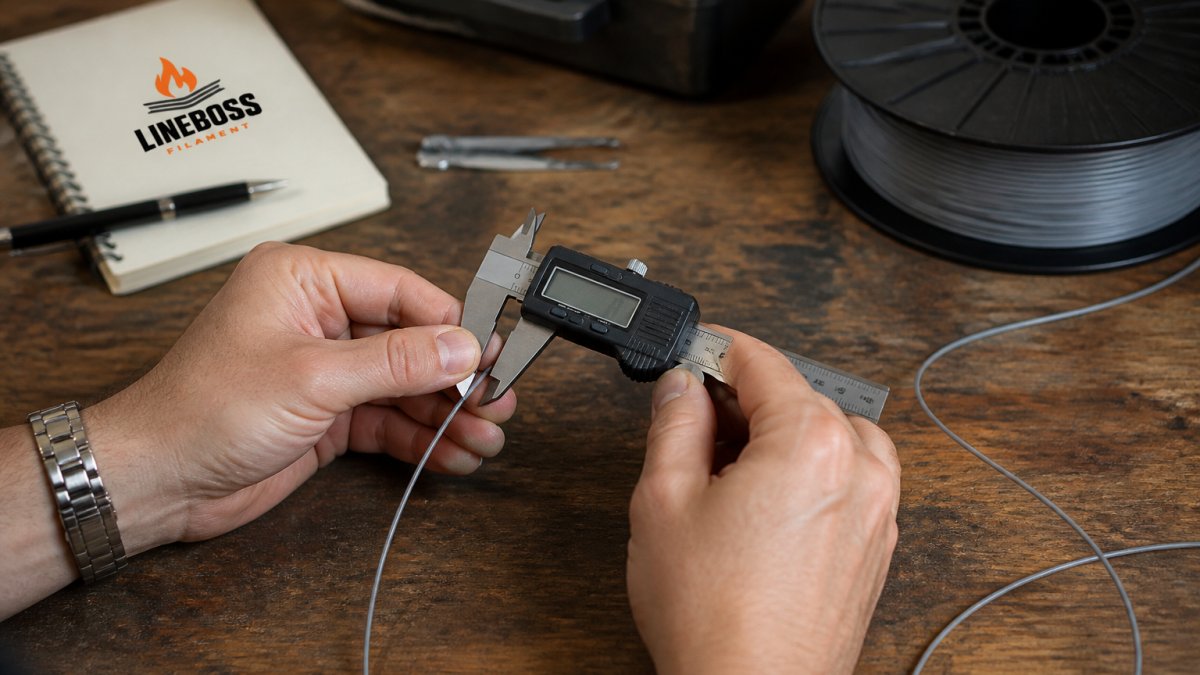
The goal is a range, not a single number. Write down the low and high readings. That range is what your slicer and your nozzle have to live with.
Tools and Technique for an Accurate Reading
Use digital calipers with fine resolution, and measure the same way each time. Consistency matters more than the brand of tool.
- Measure at least ten points spread along the first several meters.
- Take two readings per point, rotated 90 degrees, to catch ovality.
- Avoid squeezing the jaws; let them just touch the filament.
- Record the low, high, and average for each spool.
- Recheck after a spool has sat out in humid air.
For a repeatable protocol covering diameter, ovality, color, and spool-to-spool variation, see how to compare filament consistency.
Filament Diameter Tolerance and What It Means for Your Nozzle
Filament diameter tolerance is the allowed deviation from nominal diameter across a spool and between spools.
LineBoss Filament spools are specified at +/-0.02 mm diameter tolerance.
The nozzle interacts with this directly. A small nozzle has a narrow opening, so a filament that swells slightly has less margin.
For a deeper look at reading and choosing tolerance figures, this guide on filament diameter tolerance breaks down what the numbers mean in practice.
A Practical Nozzle Selection Rule Based on Minimum Filament Diameter
Pick your nozzle from the smallest diameter you measured, not the nominal number on the label. The minimum reading is the worst case your extruder will see, so sizing to it keeps flow from starving at the tightest point, the step most nozzle guides skip.
The rule is simple:
- Find the lowest diameter across your sample readings.
- Compare it to nominal to see how far it drifts low.
- Choose a nozzle whose opening leaves comfortable margin above that low reading.
- Match line width in the slicer to the nozzle, not to the label.
Why the Minimum Reading, Not the Average, Drives the Choice
The slicer calculates extrusion volume from the filament diameter you enter.
A Decision Rule You Can Apply to Any Spool
Use the measured minimum to place the spool in one of three bands. These are starting points, not universal rules; your hotend, extruder, and material shift the right numbers.
| Measured Minimum vs. Nominal | What It Suggests | Nozzle Direction |
|---|---|---|
| Within a tight tolerance band (for example, +/-0.02 mm) | Predictable flow; standard profile holds | Keep your intended nozzle |
| Drifts low but stays above roughly 1.70 mm | Flow margin is thinner; watch small nozzles | Stay at 0.4 mm or larger |
| Drifts low below roughly 1.70 mm | High under-extrusion risk at tight sections | Size up; avoid 0.2-0.3 mm |
Verify the exact cutoffs against your printer and material documentation before committing.
Matching Nozzle Size to Filament Diameter
Most desktop printers run 1.75 mm filament, and the nozzle size is chosen for detail and speed, not for the filament diameter itself. The two are separate variables; what links them is flow.
A small nozzle (0.2 mm, 0.25 mm, 0.3 mm) gives fine detail and thin walls, but has the least tolerance for diameter drift and the highest clog risk.
| Nozzle Size | Best For | Watch For |
|---|---|---|
| 0.2-0.25 mm | Fine detail, small text | Clogs, slow prints, least drift margin |
| 0.3-0.35 mm | Detail with some speed | Narrow flow margin |
| 0.4 mm | General purpose | Baseline for most work |
| 0.5-0.6 mm | Faster functional parts | Less fine detail |
| 0.8-1.0 mm | Big strong prints | Poor small features |
When the Filament Is Not the Variable
Not every diameter change is intentional. Distinguish three cases before you blame the nozzle:
- Intentional variable-diameter filament: the diameter is designed to change along the length. Treat the minimum as the design point and expect flow to shift.
- Out-of-tolerance filament: the spool was meant to be constant but drifts. This is a quality signal; measure more points and consider a different spool.
- Variable-diameter extrusion process: the printer varies flow, not the filament. Nozzle choice follows the process limits, not the spool.
Each case points to a different fix. Sizing the nozzle to the minimum is the common first move in all three.
0.4 mm Nozzle Layer Height and Line Width Settings for Nonuniform Filament
A 0.4 mm nozzle is a common starting point, and its layer height and line width settings need care when filament varies.
Your printer, hotend, and material determine the right layer height and line width values; check them against your printer and material documentation.
Pair any layer height change with a flow calibration pass rather than guessing.
Do not copy retraction or temperature numbers from a generic guide.
Slicer and Firmware Setup for Variable Diameter Filament
Set the slicer's filament diameter to your measured average, then verify flow with a calibration print. Firmware and slicer both assume a fixed diameter, so the honest average is the best single number to enter, and since the slicer does not know your spool varies, you have to build the margin yourself.
- Enter the measured average diameter, not the nominal label.
- Run a flow or extrusion multiplier calibration.
- Check the first layer and adjust the Z offset.
- Keep a per-spool note of the measured range.
- Recalibrate when you switch to a spool with a different range.
How the Slicer Uses Filament Diameter
The slicer converts a requested line width and layer height into an extrusion length using the filament cross-section (Slic3r Manual). Change the entered diameter and every extrusion move changes with it.
Flow, extrusion multiplier, and volumetric flow are related but not interchangeable:
- Filament diameter sets the cross-section the slicer assumes.
- Extrusion multiplier (flow) scales the commanded extrusion up or down.
- Volumetric flow limit caps how fast the hotend can melt plastic, regardless of diameter.
When filament varies, the diameter input is the coarse correction and the flow multiplier is the fine one. The volumetric limit is the safety ceiling, if a large nozzle plus a fast profile exceeds the hotend's melt capacity, the print under-extrudes even with perfect diameter input.
A Setup Order That Respects the Assumption
- Enter the measured average filament diameter.
- Calibrate flow with a flow test print and measure the walls.
- Set a volumetric flow limit your hotend can sustain, per the printer documentation.
- Check the first layer and adjust Z offset.
- Note the measured range and recheck when you change spools.
For material starting settings and a step-by-step tuning workflow, the slicer settings guide covers checking filament condition, temperature, flow, retraction, and printer setup in order. To see how flow changes affect material use, the 3D printing cost calculator helps you compare profiles.
Firmware and Extruder Constraints
Firmware adds its own assumptions; check your printer documentation for extruder calibration and any flow or pressure-advance settings. Check your printer documentation for extruder calibration and any flow or pressure-advance settings before you tune around a diameter problem. Do not copy retraction or temperature numbers from a generic guide; those depend on your hotend, your material, and the maker's published limits.
When the Slicer Cannot Keep Up
If your slicer or firmware has no way to vary diameter along the print, the practical fallback is to tune to the minimum and accept slight over-extrusion at the thick sections, or to size up the nozzle so the variation matters less. Neither is perfect; both are honest about the assumption the software makes.
3D Printer Under-Extrusion Troubleshooting When Diameter Drifts
3D printer under-extrusion troubleshooting starts with the filament, not the hotend. When extrusion thins out, check the measured diameter before you tear down the nozzle.
Work through it in order:
- Re-measure the filament at several points.
- Compare the reading to the slicer's entered diameter.
- Check for a partial clog or dragging extruder gear.
- Verify flow calibration with a test print.
- Confirm temperature is within the maker's published range.
Test and Calibrate Before You Commit a Spool
Run a small calibration batch before you trust a full spool. Print a flow test, a small detail piece, and a functional part. Compare results across the spool's range, not just the first meter.
- Print a flow calibration cube and measure the walls.
- Print a fine-detail test to check the small nozzle's limits.
- Print a functional bracket to check layer adhesion.
- Log the results next to your measured diameter range.
Frequently Asked Questions
What nozzle diameter should I use with variable-diameter filament?
Base the choice on the smallest diameter you measure across the spool, not the nominal figure on the label. Measure at several points along the strand with calipers and note the low end. A nozzle that is comfortably larger than that minimum keeps extrusion consistent when the filament thins out. The goal is a nozzle size that never has to fight a strand that is momentarily undersized.
Does filament diameter need to match nozzle diameter?
No. The two are related but not matched. Filament diameter describes the feedstock going into the hotend, while nozzle size sets the line width and layer height you can print. What matters is that the filament's minimum diameter stays safely above the point where the extruder cannot push enough material through the nozzle bore. A strand that drifts well below nominal is where extrusion problems start.
Can inconsistent filament diameter cause under-extrusion or over-extrusion?
Yes, and it is one of the more common causes people overlook. The slicer assumes a fixed diameter when it calculates how much material to push. If the actual strand is thinner than that assumption, you get less plastic than planned and the print looks under-extruded. If it is thicker, you get over-extrusion, blobbing, and rough surfaces. Measuring the spool and adjusting flow multiplier is the practical fix before you start chasing mechanical causes.
Should I adjust flow rate if filament diameter varies?
Adjust flow multiplier based on the average diameter you measure, then watch the first layers for signs it needs another pass. If the spool varies widely, no single flow value will be perfect, which is why tolerance matters as much as average diameter. Run a small calibration print, compare wall thickness against the slicer's expected value, and nudge flow in small increments. LineBoss publishes starting profiles and slicer guidance you can use as a baseline before tuning.
The real challenge with variable diameter filament is that the numbers on the label and the numbers on your calipers rarely match exactly. LineBoss Filament builds spools to +/-0.02 mm diameter tolerance, seals them with desiccant, and backs them with product-specific setup support so your starting profile is close before you tune. Get started with LineBoss Filament and calibrate once, then print with confidence.
