Material guide
How to Choose Filament Diameter Tolerance for Consistent Prints
From planning to printing
Find material for your next print
Compare current colors, prices, and setup requirements before choosing a spool for your project.
Share this guide
Get the article link

Last Updated: October 25, 2026
Quick Summary
Choose filament diameter tolerance by matching it to your smallest feature and nozzle size: fine detail on a small nozzle needs the tightest available spec, while large decorative prints and draft prototypes tolerate looser filament diameter tolerance. Confirm the spec by measuring samples across the spool length, since a ±0.02 mm spec allows a 0.04 mm total spread.
- A ±0.02 mm tolerance on a 1.75 mm spool allows readings from 1.73 mm to 1.77 mm.
- Measure every 10 cm along a 30 cm sample and rotate the caliper 90 degrees at each point.
- Sample near the outer wrap, middle, and inner core to judge a whole spool.
- Check ovality by comparing the 0-degree and 90-degree readings at each point.
- Flow rate calibration fixes a consistent error but cannot fix diameter variation.
Table of Contents
- What Filament Diameter Tolerance Actually Controls
- How to Measure Filament Diameter Without Fooling Yourself
- Filament Ovality: The Spec Most Buyers Never Check
- How Filament Diameter Variation Print Quality Shows Up
- Matching Nozzle Diameter and Layer Height to Your Filament Spec
- A Step-by-Step Method for Choosing a Tolerance Specification
- Pick Your Spool and Start Measuring
- Frequently Asked Questions
What Filament Diameter Tolerance Actually Controls
Filament diameter tolerance is the allowed range between a spool's stated diameter and its actual measured diameter. It controls how evenly your extruder grips and melts material.
The short answer: match tolerance to your smallest feature and your nozzle size. Tighter tolerance costs more.
Most buyers never read this spec. They check color, price, and material type, then wonder why one spool prints clean and the next one under-extrudes.
Nominal Diameter vs. Real Diameter
Nominal diameter is the number on the label. Real diameter is what your calipers read. A spool labeled 1.75 mm filament diameter is not exactly 1.75 mm everywhere.
The label states a target. The tolerance states how far from that target the maker allows the real number to drift.
LineBoss Filament publishes a +/-0.02mm diameter tolerance on its filament line. That is a tight window.
Why 1.75 mm Filament Diameter Accuracy Varies by Spool
Three things move the number along a single spool:
- Extrusion speed during manufacture. Faster lines cool the strand unevenly.
- Cooling and pull tension. Slight stretching thins sections of the strand.
- Winding tension. Tight winds can compress the filament on the spool.
Quality control catches most of this. It does not catch all of it. That is why diameter variation shows up between spools from the same brand, not just between brands. For a deeper look at comparing consistency across suppliers, see how to compare filament consistency.
How to Measure Filament Diameter Without Fooling Yourself
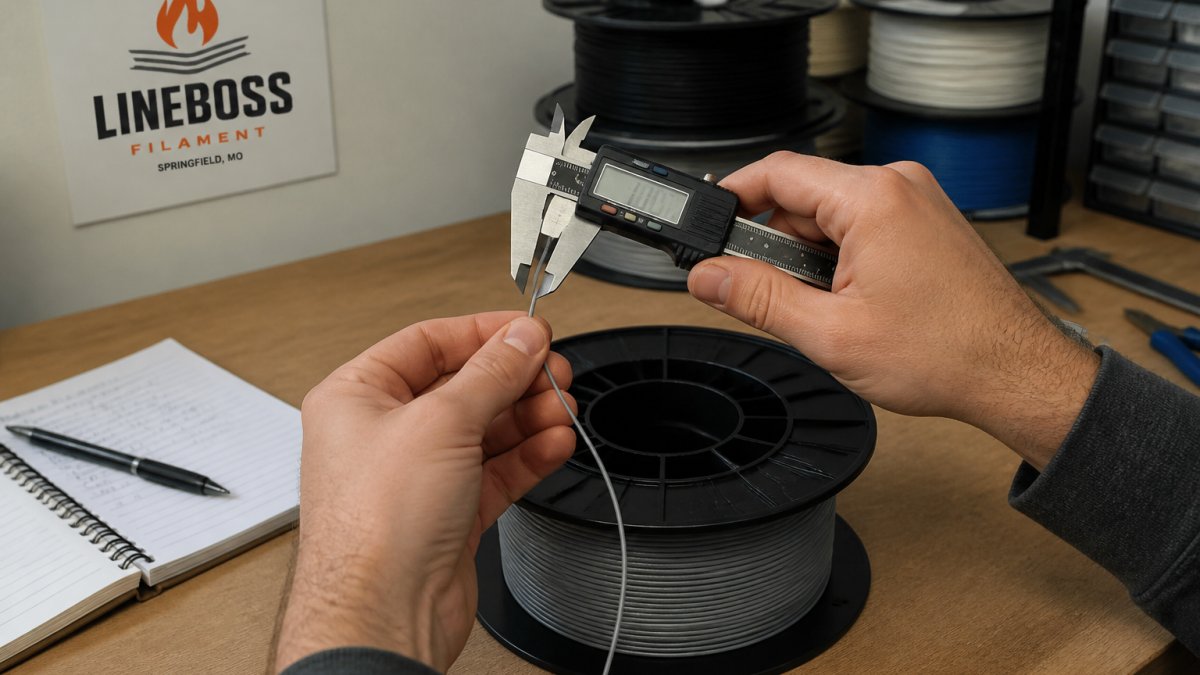
Measuring filament diameter is simple, but most people do it wrong. Squeeze the caliper jaws too hard and you flatten the strand.
Here is a method that gives you usable data:
- Unspool about 30 cm of filament.
- Wipe it clean with a dry cloth.
- Close the caliper jaws on the strand with light pressure only, enough to contact the surface, not enough to compress it.
- Take a reading every 10 cm along that length.
- Rotate the caliper 90 degrees at each point and read again.
- Write down all readings, not just the average.
That last step matters. An average hides the problem. The spread between your highest and lowest reading is what your extruder actually feels.
Watch out: measuring right at the spool edge gives false readings. The filament is still curved there and the caliper sits at an angle.
Build a Sampling Plan Across the Spool
A 30 cm sample checks one short stretch. To judge a whole spool, sample at several depths: near the outer wrap, around the middle of the spool, and near the inner core. Take the same 10 cm interval and 90-degree rotation readings at each depth. This catches problems that only appear after the first few meters, such as a strand that thins as winding tension changes.
Record each reading with its location (outer, middle, inner) and axis (0 degrees, 90 degrees). A simple notebook table is enough:
| Location | Axis | Reading (mm) |
|---|---|---|
| Outer | 0° | |
| Outer | 90° | |
| Middle | 0° | |
| Middle | 90° | |
| Inner | 0° | |
| Inner | 90° |
Calculate Average, Range, and Variation
Once you have readings, do three quick calculations:
- Average: add all readings and divide by the count. This is your best estimate of the real diameter.
- Range: subtract the lowest reading from the highest. This is the total spread your extruder experiences.
- Deviation from nominal: subtract the nominal diameter (for example, 1.75 mm) from the average. This tells you whether the spool runs high or low overall.
Compare the range to the maker's stated tolerance. If the label says ±0.02 mm, the total allowed spread is 0.04 mm. A measured range wider than that means the spool is outside its own spec, regardless of what the average says.
Account for Caliper Technique and Measurement Uncertainty
Calipers have their own accuracy limit, and hand pressure adds error. A reading of 1.74 mm might really be 1.75 mm. Judge the trend across many readings, not a single number.
Dry filament measures more reliably than damp filament. If your spools sit out in humid air, a dryer removes that variable before you test.
Filament Ovality: The Spec Most Buyers Never Check
Filament ovality is how far a strand's cross-section deviates from a perfect circle.
Ovality matters because your extruder grips the filament on one axis. A flattened strand feeds and melts unevenly, and no slicer setting fully corrects for it.
To check ovality, use the 90-degree rotation step from the measuring method above. Compare the two readings at each point.
Add measurement uncertainty to the picture. Calipers have their own accuracy limit, and hand pressure adds error.
How Filament Diameter Variation Print Quality Shows Up
Diameter variation shows up as inconsistent extrusion, and inconsistent extrusion shows up as bad surfaces. The symptoms are easy to spot once you know them:
- Under-extrusion in patches, with gaps in top layers
- Over-extrusion nearby, with rough, blobby walls
- Inconsistent walls that look thick in one area and thin in another
- Poor dimensional accuracy on parts that should fit together
- Weak layer adhesion where a thin section under-filled
Flow rate calibration fixes a consistent error. It cannot fix variation, because the error changes as the spool unwinds. That is the difference between a bad setting and a bad spool.
A common mistake is chasing slicer settings for weeks when the real cause is diameter drift. Check the filament first.
Matching Nozzle Diameter and Layer Height to Your Filament Spec
Nozzle diameter and layer height set how much error your printer can absorb.
Layer height works the same way. Thin layers, around a quarter of your nozzle diameter or less, show extrusion flaws more clearly. Thick layers hide them.
Printer compatibility matters too. LineBoss publishes slicer settings guidance as a starting point, not a universal answer.

Tighter tolerance costs more per spool and can mean more waste during setup. A 3D printing cost calculator helps you weigh that tradeoff against real print costs.
A Step-by-Step Method for Choosing a Tolerance Specification
Choosing a tolerance specification comes down to matching the spec to what you print and what your printer can absorb. Work through these steps in order:
- List your smallest feature. Note the thinnest wall, smallest hole, and tightest fit on your typical parts. These set the error budget.
- Identify your nozzle diameter. Fine detail on a small nozzle needs tighter control; a large nozzle pushes more material and tolerates more variation.
- Note your extruder type. Direct-drive extruders grip filament more firmly than long Bowden paths, which makes them less sensitive to small diameter changes. Start from your printer maker's documented settings.
- Set your acceptance window. Write down the max and min diameter your printer tolerates, based on your own test prints and the maker's documented limits.
- Check the published spec. Compare the maker's stated tolerance to your window. A ±0.02 mm spec allows a 0.04 mm total spread.
- Measure a sample spool. Take readings across the length and confirm the spec holds.
- Document your acceptance criteria. Keep a simple log of spool, readings, and print result.
Use this summary to match your situation to a tolerance target:
| Your situation | Tolerance target | Why |
|---|---|---|
| Fine detail, small nozzle | Tightest available | Small errors show on thin walls |
| Functional parts, fits and clearance | Tight | Dimensional accuracy depends on it |
| Large decorative prints | Moderate | Errors average out over big surfaces |
| Draft prototypes | Loose is fine | Speed matters more than finish |
Interpret the Stated Tolerance Correctly
A ± tolerance is a window, not a guarantee at every point. A ±0.02 mm spec means the maker allows readings from 1.73 mm to 1.77 mm on a 1.75 mm spool. Your job is to confirm the spool stays inside that window across the length, not just at one spot. If your measured range exceeds the stated window, treat the spool as out of spec even if the average looks good.
Set Pass/Fail Acceptance Criteria
A usable acceptance framework has three checks:
- Average within spec: the mean of your readings falls inside the stated window.
- Range within spec: the highest minus lowest reading does not exceed the total allowed spread.
- Ovality within reason: the 0-degree and 90-degree readings at each point stay close; a consistent gap means out-of-round filament.
If a spool fails any check, do not chase slicer settings to compensate. Note the spool, readings, and print result in your log, and contact the maker with the data. A spool that holds its spec across the full length is worth more than a cheaper one you have to fight.
Tolerance Differs by Nominal Diameter and Material
A 1.75 mm spool and a 2.85 mm spool are not judged the same way.
Material behavior matters too. PLA and PETG behave differently as they melt, so the same diameter spec can print differently across filament type.
Tighter tolerance costs more per spool and can mean more waste during setup. A 3D printing cost calculator helps you weigh that tradeoff against real print costs.
Pick Your Spool and Start Measuring
Reading a spec sheet is step one. Measuring your own spool is step two, and it is the step that actually protects your prints.
Start with a material that fits your project. LineBoss PLA+ filament suits functional parts and prototypes that need toughness. LineBoss PETG filament fits mechanical parts and outdoor tools.

Then measure, log, and compare. A spool that holds its spec across the full length is worth more than a cheaper one you have to fight.
Frequently Asked Questions
What filament diameter tolerance should I look for?
For detailed functional parts and multi-hour prints, look for a stated tolerance of ±0.02 mm to ±0.05 mm on 1.75 mm filament. Tighter than that helps most on small nozzles and long unattended runs. Looser specs can still print fine for rough prototypes, but expect more flow adjustment between spools. Always check that the tolerance is printed on the spool label or product page, and confirm it with your own caliper measurements before committing a large order.
How does filament diameter tolerance affect print quality?
Your slicer assumes one diameter when it calculates how much plastic to push. If the real filament is thicker than nominal, you get over-extrusion: bulging walls, blobby corners, and tight tolerances that close up. Thinner filament under-extrudes, leaving weak layer bonding and gaps. The bigger the allowed variation, the more your flow rate drifts from spool to spool, which is why filament diameter variation print quality is a real production issue rather than a spec-sheet detail.
What is the difference between filament diameter tolerance and ovality?
Tolerance is how far the diameter can drift from nominal along the strand. Ovality is how far the cross-section is from a perfect circle, so a strand can sit inside its diameter spec and still be egg-shaped. Oval filament feeds unevenly because the extruder grips a different thickness as the strand rotates. Ask for both figures, or measure across two perpendicular directions with calipers to catch it yourself.
Can I adjust slicer settings to compensate for inconsistent filament diameter?
You can compensate, but only up to a point. Measure the average diameter across a section of the spool and enter that value into your slicer's filament diameter field, then recalibrate flow. That corrects a consistent offset, not variation within a spool. If diameter swings widely, no single flow value fits the whole print. Start from the profiles at https://linebossfilament.com/pages/slicer-settings, then tune, and use the cost calculator at https://linebossfilament.com/pages/3d-printing-cost-calculator to weigh tighter-spec filament against failed prints.
Most print problems blamed on settings trace back to filament that never held its stated diameter. LineBoss Filament builds spools to a +/-0.02mm diameter tolerance, vacuum seals each one with desiccant, and backs it with practical setup support from a team that prints. Get started with LineBoss Filament and take the variable out of your next spool.
