Material guide
Does Layer Height Affect Filament Extrusion Consistency?
From planning to printing
Find material for your next print
Compare current colors, prices, and setup requirements before choosing a spool for your project.
Share this guide
Get the article link

Last Updated: November 15, 2026
Quick Summary
Layer height sets how much plastic the nozzle must push through a given length of travel, so it directly drives extrusion consistency. Keep layer height between roughly 25% and 75% of nozzle diameter, about 0.1 mm to 0.3 mm on a 0.4 mm nozzle, and verify it with a measured single-wall test print.
- A taller layer demands more volumetric flow from the hotend, while a shorter layer multiplies passes and print time.
- If you need a taller layer than 0.3 mm allows, the fix is a larger nozzle, not a higher slicer value.
- Volumetric flow equals line width multiplied by layer height multiplied by print speed.
- Start diagnosis with filament diameter and moisture, then confirm flow with a single-wall measurement.
- Z-banding repeating at a fixed interval usually points to a mechanical issue rather than layer height.
Table of Contents
- How Layer Height Drives Extrusion Consistency
- Layer Height vs Nozzle Size: The Ratio That Sets Your Limits
- 3D Printing Extrusion Calibration: A Repeatable Workflow
- Balancing Layer Height Against Print Speed and Part Strength
- Setting Layer Height by Material and Part Type
- Troubleshooting Extrusion Symptoms Tied to Layer Height
- First-Layer Height, Bed Adhesion, and Adaptive Layer Height
- Picking Filament for Your Next Calibrated Print
- Frequently Asked Questions
How Layer Height Drives Extrusion Consistency
Layer height for consistent filament extrusion is the slicer value that decides how much plastic the nozzle must push through a given length of travel, and small changes shift every downstream setting. Extrusion problems blamed on filament quality often trace back to a layer height that outruns what the nozzle and hotend can reliably deliver.
That relationship changes how you diagnose a bad print: check the ratio between layer height and nozzle diameter before swapping spools.
What Layer Height Actually Controls in FDM
Layer height is the vertical thickness of each deposited bead, measured in millimeters, and it sets the foundation for every other print setting.
Layer height and extrusion consistency are locked together. Push the height too far above what the nozzle diameter supports and the extruder skips, the bead thins, and walls develop gaps. Drop it too low and back pressure rises, risking heat creep and inconsistent flow.
Layer Height vs Nozzle Size: The Ratio That Sets Your Limits
The relationship between layer height and nozzle size governs everything else. A common starting guideline is to keep layer height between roughly 25% and 75% of the nozzle diameter, keeping the bead wide enough to bond to its neighbor while thin enough for the hotend to melt consistently.
For a 0.4 mm nozzle, that puts the practical band at about 0.1 mm to 0.3 mm. Treat those numbers as a starting point, not a guarantee, because the actual limit depends on your hotend, heater cartridge, and how well your filament feeds.
Working Ranges for a 0.4 mm Nozzle
| Layer Height | Nozzle Ratio | Best For | Watch For |
|---|---|---|---|
| 0.08-0.12 mm | 20-30% | Miniatures, fine detail, smooth curves | Long print times, heat creep risk |
| 0.16-0.20 mm | 40-50% | Everyday functional parts, prototypes | None typical; the safe default band |
| 0.24-0.28 mm | 60-70% | Fast drafts, large brackets, jigs | Weaker layer bonding, visible stepping |
| 0.30 mm+ | 75%+ | Rough mockups only | Extruder skipping, thin walls, poor adhesion |
If you need a taller layer than 0.3 mm allows, the fix is a larger nozzle, not a higher slicer value. A 0.6 mm nozzle moves the whole band upward and keeps the ratio healthy.
3D Printing Extrusion Calibration: A Repeatable Workflow
3D printing extrusion calibration is a repeatable process of tuning temperature, flow, and retraction against a fixed layer height so every spool prints the same way.
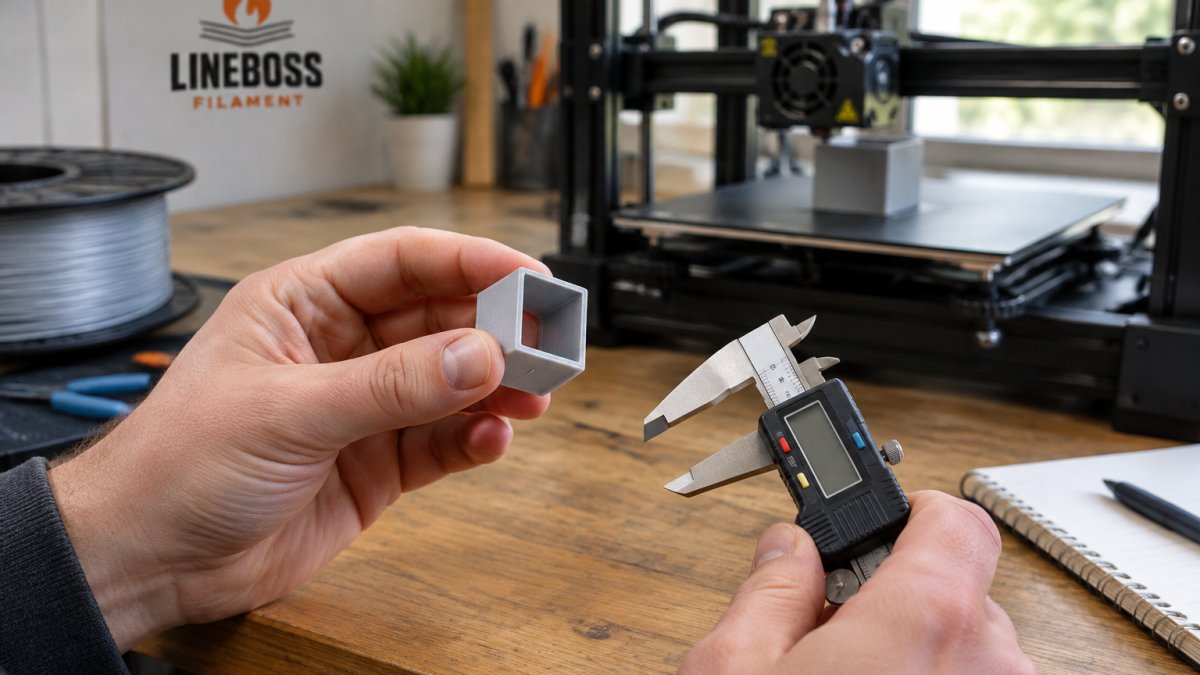
- Confirm filament diameter. Measure across several points with calipers and record the average. Diameter tolerance directly affects how much plastic each millimeter of extrusion delivers.
- Dry the filament if needed. Moisture causes popping, inconsistent flow, and weak layer adhesion that mimics a settings problem. Start with the product's guidance and drying conditions appropriate for both the material and the spool.
- Print a single-wall test cube at your intended layer height and a known line width.
- Measure the wall thickness with calipers and compare it to the slicer's expected value.
- Adjust the extrusion multiplier in small increments, then reprint and re-measure.
- Tune temperature and retraction with small test prints, changing one variable at a time.
- Record the successful profile so repeat jobs are reproducible.
The LineBoss slicer settings guide provides material starting settings and a step-by-step tuning workflow that pairs with this sequence.
Reading the Results: Flow, Line Width, and Volumetric Limits
Once the cube measures true, check the volumetric flow ceiling. Volumetric flow equals line width multiplied by layer height multiplied by print speed, and every hotend has a limit it can melt reliably. If walls thin out only on fast sections, the layer height and speed combination is exceeding that ceiling, not the filament.
Balancing Layer Height Against Print Speed and Part Strength
Taller layers cut print time but weaken interlayer bonding, because each bead has less surface contact with the one below. The tradeoff is not linear, and the right balance depends on your printer, nozzle, and material.
A material that feels stiff is not automatically the best choice for impact resistance, and the same logic applies to layer height. If layer bonding is the weak point, the guidance on improving layer adhesion covers temperature, cooling, and drying adjustments.
Setting Layer Height by Material and Part Type
Material choice shifts the sensible layer-height band because each polymer responds differently to the thermal and rheological conditions a given layer height creates. The table below summarizes the practical pattern most practitioners converge on for a 0.4 mm nozzle; treat it as a starting point and verify against the material maker's published limits before committing a profile.
| Material | Sensible layer-height band (0.4 mm nozzle) | Why the band shifts | Part types that fit |
|---|---|---|---|
| PLA / PLA+ | 0.12-0.24 mm | Stiff, low-shrink, forgiving of moderate flow; taller layers cool fast and bond acceptably | Display pieces, prototypes, jigs, brackets |
| PETG | 0.16-0.24 mm | Higher viscosity and stickier melt; tall layers plus fast flow can leave rough tops and stringing | Fixtures, enclosures, parts needing toughness |
| ABS / ASA | 0.16-0.24 mm | Shrinkage and warping dominate; layer height matters less than enclosure and cooling control | Functional parts in suitable enclosed equipment |
| TPU / flexible | 0.12-0.20 mm | Soft filament buckles under back pressure; shorter layers reduce the volumetric demand per pass | Gaskets, grips, wear pads |
| Filled (CF/GF, metal, wood) | 0.16-0.24 mm | Abrasive or particulate fillers raise back pressure and wear; larger nozzles are often the better fix than taller layers | Stiff structural parts, aesthetic pieces |
Sensible layer-height band (0.4 mm nozzle)
Why the Band Shifts, Not Just the Number
The mechanism behind each row is volumetric demand and melt behavior. A taller layer asks the hotend to plasticize a larger cross-section per unit of travel; high-viscosity materials (PETG) or low-stiffness ones (TPU) hit their reliable ceiling sooner than PLA.
Watch out: do not compensate for a material printing poorly at a given layer height by dropping temperature below the maker's published minimum, that trades one extrusion problem for another (poor bonding, layer separation) and can clog the hotend.
Part Type Decides the Tie-Breaker
When two layer heights both sit inside the material's band, let the part's job decide. Appearance-focused pieces benefit from the shorter end because thinner layers reduce visible stepping on curves. Jigs, brackets, and fixtures usually want the mid-to-upper end with solid infill, since time savings outweigh surface finish and strength loss is modest within the band. Parts seeing impact or bending loads should stay mid-band with tuned cooling and drying.
Where Material and Layer Height Interact With Extrusion
The material also changes what "consistent extrusion" looks like. PLA tolerates a wider flow window; PETG and TPU narrow it. That is why the calibration workflow earlier should be re-run whenever you change material family, not just layer height. The LineBoss slicer settings guide lists material starting settings to use as a baseline before tuning layer height against them.
Troubleshooting Extrusion Symptoms Tied to Layer Height
Most extrusion artifacts map to a small set of layer-height-related causes, but the useful skill is knowing which variable to change first and how to confirm the fix with a test rather than a guess. The table below pairs each visible symptom with the likely layer-height mechanism, the first check to run, and the corrective test.
| Symptom | Likely layer-height mechanism | First check | Corrective test |
|---|---|---|---|
| Gaps or thin lines in top surfaces | Layer height too tall for the hotend to fill the bead consistently, or flow set too low | Compare measured single-wall thickness to slicer expectation | Reprint the single-wall cube at the same height with flow adjusted in small increments |
| Extruder clicking or skipping | Volumetric demand (line width x layer height x speed) exceeds what the hotend can melt | Calculate volumetric flow at the failing speed and compare to the hotend's rated capacity | Reduce speed or layer height, reprint, and confirm the click stops before changing temperature |
| Weak layer adhesion / delamination | Layer too tall for proper squish between beads, or moisture in filament | Check filament for popping and measure diameter; review drying history | Dry the spool, reprint at a mid-band height, and compare bond strength on a test bar |
| Rough or ridged top surfaces | Over-extrusion at the chosen layer height, or cooling too aggressive for the material | Inspect the top surface under raking light and compare to the flow calibration result | Reprint with flow reduced slightly and cooling adjusted per material maker guidance |
| Elephant foot on first layers | First-layer height set too low, over-squishing the base | Measure the base width against the model's intended dimension | Raise first-layer height slightly and reprint the first 5 mm only |
| Inconsistent walls only at speed | Layer height and speed combination outrunning the hotend on fast sections | Identify the speed at which walls thin out | Reprint at reduced speed at the same layer height to isolate speed from height |
Diagnose in the Right Order
The order matters because several symptoms share causes. Start with filament diameter and moisture, since both mimic settings problems and are cheap to rule out. Then confirm flow with a single-wall measurement at the intended layer height.
Watch out: raising temperature to fix extruder skipping without first checking volumetric flow can push the hotend into heat creep and clogging, especially on all-metal hotends with marginal cooling.
When the Symptom Is Not Layer Height
Some artifacts look layer-height-related but are not. Z-banding repeating at a fixed interval usually points to a mechanical issue (leadscrew, coupler, or Z-axis binding) rather than layer height. Random gaps across many layers more often indicate intermittent filament feed or a partially clogged nozzle. Before changing layer height, confirm the defect matches the layer-height mechanism in the table; if not, the fix lives elsewhere.
Record What You Changed
Keep a short log of the layer height, flow multiplier, temperature, and speed for each test. Without it, a fix that works once is hard to reproduce on the next spool. The LineBoss slicer settings guide is a reasonable place to store material baselines, and the 3D printing cost calculator helps weigh the time cost of a slower, more reliable profile against a faster one that needs more reprints.
First-Layer Height, Bed Adhesion, and Adaptive Layer Height
First-layer height deserves separate treatment. A slightly taller first layer with a clean build plate gives reliable bed adhesion without the over-squish that causes elephant foot.
Adaptive layer height lets the slicer vary thickness within one print, using thinner layers on curved and detailed regions and thicker layers on flat vertical walls. Use it when a part mixes fine detail with large plain surfaces; skip it when the part is uniformly functional.
Picking Filament for Your Next Calibrated Print
Calibration only holds when the filament itself is consistent. Comparing brands by diameter tolerance and moisture control is more useful than comparing headline prices.
LineBoss Filament seals spools in vacuum packing with desiccant and holds a +/-0.02 mm diameter tolerance, which supports repeatable extrusion across a batch. For a full picture of material cost per part, the 3D printing cost calculator helps compare options before ordering.
Consistent extrusion starts with matching layer height to your nozzle, hotend, and material, then verifying it with a measured test print rather than a guess.
Frequently Asked Questions
How does layer height affect filament extrusion consistency?
Layer height changes how much filament the extruder must push per pass. Thinner layers demand smaller, more closely controlled extrusion volumes, so flow errors show up faster as blobs, gaps, or uneven walls. Thicker layers push more plastic through the nozzle and can expose volumetric flow limits. Matching layer height to nozzle diameter and confirming flow with a calibration print keeps extrusion even across the whole model.
What is the relationship between nozzle diameter and layer height?
A common starting point is to keep layer height between roughly 25% and 75% of nozzle diameter. On a 0.4 mm nozzle that puts practical layer heights around 0.1 mm to 0.3 mm. Going below that range can slow prints and stress the extruder; going above it reduces the squish that bonds layers. Larger nozzles allow thicker layers, but the ratio still governs how cleanly each layer forms.
Does a lower layer height require more precise extrusion?
Yes. At 0.1 mm layers the extruder delivers a smaller volume per pass, so a small flow error is a larger share of each layer. Under-extrusion shows up as gaps and weak walls; over-extrusion as ridges and blobs. A quick extrusion multiplier check, plus a clean nozzle and dry filament, matters more at fine layer heights than at 0.28 mm.
Can incorrect layer height cause under-extrusion?
It can contribute. If layer height is set beyond what the nozzle and hotend can support at your print speed, the extruder may not keep up, producing thin walls and gaps. Very fine layers also expose any partial clog or moisture in the filament. Start from the material maker's guidance, then tune temperature, flow, and retraction with small test prints on your own machine.
