Material guide
How to Improve Layer Adhesion on Your 3D Prints
From planning to printing
Find material for your next print
Compare current colors, prices, and setup requirements before choosing a spool for your project.
Share this guide
Get the article link

Last Updated: October 31, 2026
Quick Summary
Improving layer adhesion means helping each new layer partially melt the one beneath it so the polymer chains fuse. Dry your filament, run a temperature tower within the maker's range, calibrate flow, then tune part cooling and speed one variable at a time.
- Layer adhesion is the bond between printed layers; bed adhesion is the grip between the first layer and the build surface.
- Poor layer adhesion causes fall into three groups: mechanical, thermal, and moisture.
- The best temperature for layer adhesion is the lowest in the maker's range that still bonds strongly and cleanly.
- ABS and ASA need minimal or no part cooling plus an enclosure holding a stable chamber temperature.
- Change one variable per run, print the same test coupon, log the result, and compare coupons side by side.
Table of Contents
- Diagnose the Failure Before You Touch a Setting
- Interlayer Bonding vs. Bed Adhesion
- Poor Layer Adhesion Causes: Mechanical, Thermal, and Moisture
- The Best Temperature for Layer Adhesion Starts With a Temperature Tower
- 3D Printer Cooling Settings That Help or Hurt Bonding
- Filament Dryer Settings and Moisture Checks
- Mechanical and Extrusion Checks: Flow, Speed, and Hardware
- Run a Controlled Calibration Workflow and Measure Improvement
- Pick the Right LineBoss Filament for Your Adhesion Goals
- Frequently Asked Questions
Diagnose the Failure Before You Touch a Setting
Learning how to improve layer adhesion starts with one question most guides skip: is the print actually failing between layers, or is it failing at the bed? Those are different problems with different fixes.
Layer adhesion is the bond between printed layers, while bed adhesion is the grip between the first layer and the build surface. A part can stick to the bed perfectly and still split apart halfway up.
Here's how to tell them apart before touching a single slicer value:
- Interlayer bonding failure: the part cracks or separates along horizontal lines, often with a visible gap between layers
- Bed adhesion failure: the first layer lifts, curls at the corners, or detaches entirely mid-print
- Both at once: warping pulls the base up while upper layers stay fused, which usually points to cooling and ambient temperature
Watch out: adjusting first-layer settings to fix a mid-print split wastes time and can make the real problem worse. Diagnose first, then calibrate.
Interlayer Bonding vs. Bed Adhesion
Interlayer bonding depends on heat transfer. Each new layer must partially melt the layer beneath it so the polymer chains can fuse.
That difference explains why the fixes diverge. Bonding problems respond to temperature, flow, speed, and cooling. Bed problems respond to leveling, cleaning, and first-layer speed.
A useful rule: if the bottom of the part is flat and the top is cracked, the bed is fine.
Poor Layer Adhesion Causes: Mechanical, Thermal, and Moisture
Poor layer adhesion causes fall into three groups: mechanical, thermal, and moisture. Mechanical issues include under-extrusion, a slipping extruder, or a partially clogged nozzle. Thermal issues cover nozzle temperature, cooling, and chamber conditions. Moisture means the filament absorbed water before printing.
Start with the cheap checks:
- Weigh or flex a length of filament. Brittle, snapping filament often signals absorbed moisture.
- Inspect the extruder gear for filament shavings, a sign of slipping.
- Check the nozzle for partial clogs after a spool change.
The Best Temperature for Layer Adhesion Starts With a Temperature Tower
The best temperature for layer adhesion is the lowest temperature in the material maker's recommended range that still produces a strong, clean bond.
Run a temperature tower in small steps across the maker's stated range, then inspect each band.
A common mistake is chasing maximum strength with maximum heat. Too hot can cause drooping, poor bridging, and stringing without improving bond strength.
3D Printer Cooling Settings That Help or Hurt Bonding
3D printer cooling settings decide how fast each layer freezes, and that freeze rate is the single biggest lever on interlayer bonding after nozzle temperature.
The right fan setting is not a number you copy from a forum. It depends on the material, the part geometry, the nozzle and hotend, and whether the printer is enclosed. Treat the guidance below as a starting direction, then tune with a test print.
How each material family responds
- PLA: bonds readily at moderate temperatures, so strong part cooling is usually safe and helps overhangs and bridging. If layers look glossy and fused but the part still snaps along layer lines, the cause is more often temperature or flow than the fan.
- PETG: bonds well but is sensitive to over-cooling. Many practitioners run reduced part cooling compared with PLA, because a fast freeze on each layer can leave a weak seam even when the surface looks clean. PETG also tends to stick to itself and to nozzles, so balance cooling against stringing rather than maximizing either.
- ABS and ASA: shrink as they cool, and uneven cooling is the usual cause of splitting and corner lift. Minimal or no part cooling, plus an enclosure that holds a stable chamber temperature, is the standard approach. A draft across the part is worse than a slightly warm chamber.
The variables that change the answer
- Chamber and ambient temperature. An open printer in a cool room loses heat from the part faster than the same printer in a warm enclosure. That is why the same fan percentage can bond well in summer and split in winter.
- Drafts. An open window, an HVAC vent, or a nearby door changes the cooling rate far more than a fan setting. For temperature-sensitive materials, eliminate drafts before touching the slicer.
- Layer time. Small parts and thin top sections spend less time under the hot nozzle, so they cool faster per layer. Many slicers offer a minimum layer time or a slow-down-for-small-layers setting that helps bonding on small features.
A practical tuning order for cooling
- Confirm the material maker's recommended nozzle and bed temperatures, and set them first.
- Print a temperature tower to find a nozzle temperature that fuses cleanly.
- Print a cooling tower or a fan-speed test that steps the fan across the height of the part.
- Inspect each band for layer fusion, overhang quality, and stringing, and pick the band with the best balance rather than the strongest single trait.
- For enclosed materials, repeat with the enclosure closed and confirm chamber temperature is stable before judging the fan setting.
For the slicer-side values that control fan behavior, the slicer settings resource walks through the settings that matter most.
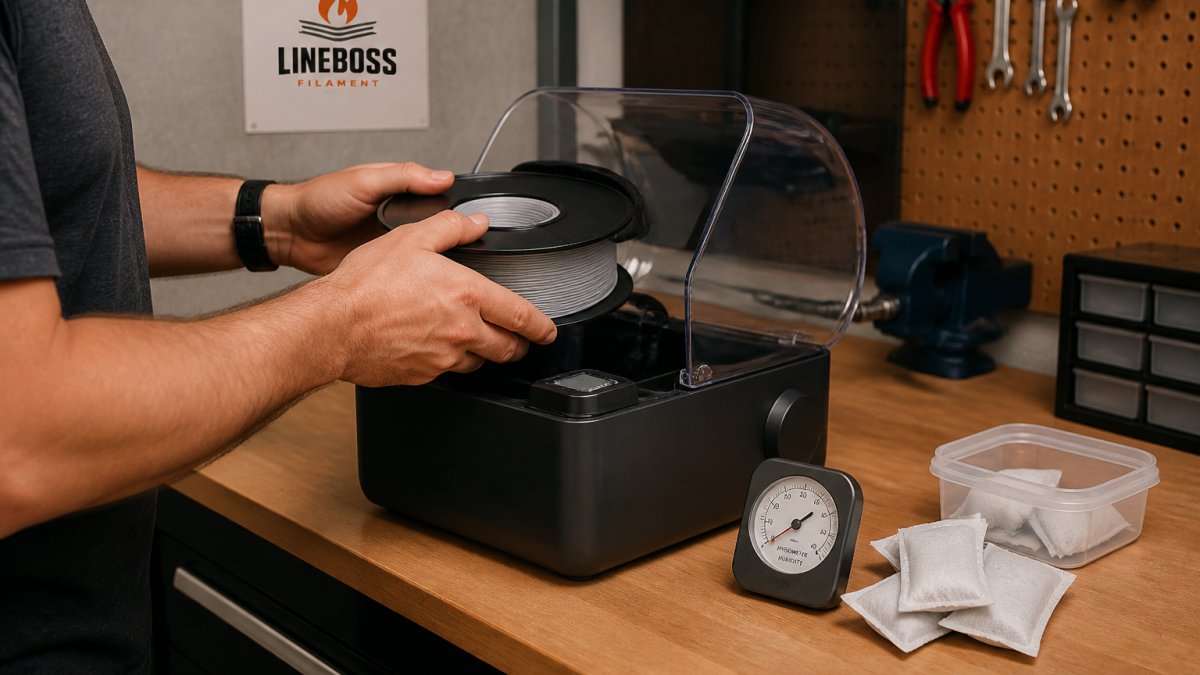
Filament Dryer Settings and Moisture Checks
Moisture in filament can turn to steam at the nozzle, causing inconsistent extrusion, popping sounds, and poor bonding.
Follow the dryer and filament maker's published temperature and time for your material. For a deeper how-to on using a dedicated dryer, see how to dry filament with a dedicated filament dryer.
Mechanical and Extrusion Checks: Flow, Speed, and Hardware
Extrusion problems mimic thermal ones. If the extruder can't push filament consistently, no temperature change will fix the bond.
Work through these in order:
- Check extrusion flow rate with a calibration print and adjust in small steps.
- Verify the extruder gear grips the filament without slipping or grinding.
- Slow print speed, especially infill speed, since fast infill often under-extrudes.
- Inspect the nozzle for wear or a partial clog and replace if needed.
For slicer-side values, the slicer settings resource walks through the settings that matter most.
Run a Controlled Calibration Workflow and Measure Improvement
Most adhesion guides hand you a pile of disconnected tips. The gap none of them close is order: which variable to change first, how to know a change helped, and how to avoid chasing two problems at once. This section gives a controlled workflow that changes one variable per run and a simple way to compare results so you are not relying on memory or appearance alone.
The rule that makes the workflow work
Change one variable, print the same test part, record the result, then decide. If you change temperature and fan speed in the same run, you cannot tell which one fixed the bond or which one caused the new stringing. Keep a short log: date, material, spool, nozzle temperature, bed temperature, fan setting, flow, speed, and a one-line result. The log is what turns tweaking into calibration.
The ordered workflow
| Step | Action | What to change | What to look for |
|---|---|---|---|
| 1 | Confirm the failure mode | Nothing yet | Is the part splitting between layers, or lifting from the bed? |
| 2 | Dry the filament per maker guidance | Moisture only | Popping, inconsistent extrusion, rough surface |
| 3 | Run a temperature tower across the maker's stated range | Nozzle temperature | Clean layer fusion, minimal stringing, no under-extrusion |
| 4 | Calibrate flow rate | Extrusion multiplier | Wall thickness, gaps between perimeters, top-surface finish |
| 5 | Tune part cooling | Fan speed | Overhang quality, bond strength, stringing |
| 6 | Adjust speed, especially infill | Print speed | Under-extrusion, layer gaps, surface finish |
| 7 | Re-check hardware | Extruder tension, nozzle condition | Slipping, grinding, partial clogs |
Run the steps in order because each one depends on the last. A temperature tower printed with wet filament or a slipping extruder tells you nothing useful. Fix moisture and hardware first, then tune thermal settings, then flow, then cooling, then speed.
How to measure whether adhesion improved
Appearance is a weak signal. A part can look perfectly fused and still snap along layer lines. Use a repeatable test instead:
- Print the same test coupon each run. A simple bar or a small bracket printed in the same orientation gives you a like-for-like comparison.
- Bend or snap it the same way. Flex the coupon along the layer direction until it yields, and note whether it delaminates cleanly, tears, or holds. Do the same motion every time.
- Compare side by side. Keep the coupons from each run and line them up. A change that looked promising on screen often looks unremarkable next to the previous coupon.
For the slicer-side values that drive flow, speed, and cooling, the slicer settings resource walks through the settings that matter most. If you want to see how material and print time affect the cost of each test run, the 3D printing cost calculator is a useful companion.
Pick the Right LineBoss Filament for Your Adhesion Goals
Material choice sets the ceiling on bond strength. Some filaments simply bond more readily than others.
LineBoss PETG Filament is a strong everyday pick for functional parts.
LineBoss PLA+ Filament is a fit for makers who want easier printing with stronger layer bonding than standard PLA. The PLA+ article explains how the material targets layer adhesion.
LineBoss ABS Filament and LineBoss ASA Filament suit higher-temperature or outdoor parts.
If you're ready to act on the material recommendation, browse the LineBoss PLA+ Filament.

Frequently Asked Questions
Why are my 3D print layers separating?
Layer separation usually means the bond between deposited layers is weaker than the stress pulling them apart. Common poor layer adhesion causes include printing too cold, excessive part cooling, wet filament, under-extrusion, or too much speed for the material. Start by printing a temperature tower within the filament maker's recommended range, dry the spool if moisture is suspected, and confirm your extruder is gripping and feeding consistently. Fix one variable at a time so you can tell which change actually improved the bond.
How do I improve layer adhesion with PLA or PETG?
For PLA, print toward the upper end of the maker's temperature range and keep part cooling moderate on functional parts. For PETG, higher nozzle temperatures and reduced cooling usually help, and PETG benefits from slower print speeds because it bonds better when layers have time to fuse. Dry both materials if they have absorbed moisture, and verify extrusion flow rate with a calibration print. LineBoss PLA+ and PETG both offer product-specific starting settings to tune from.
Can wet filament cause poor layer adhesion?
Yes. Moisture in filament turns to steam at the nozzle, which creates micro-voids and inconsistent extrusion that weaken interlayer bonding. Signs include popping sounds, visible bubbles, rough surface finish, and brittle parts. Use a filament dryer set to the temperature the filament maker recommends for that material, and store spools sealed with desiccant. If you are unsure whether a spool is wet, dry it and reprint the same test part to compare bond strength.
Does print speed affect layer adhesion?
It can. Higher print speeds push more plastic through the hotend and can reduce the time each layer spends bonding with the one below. If you are chasing stronger layer adhesion, slow the outer walls and infill speed, and keep first-layer speed low. Adjust one speed setting at a time and reprint a calibration part. Hardware and hotend capability matter here, so tune within what your printer and the filament maker's recommended settings support.
Weak layer adhesion rarely has one cause. It usually comes from a mix of moisture, cooling, and extrusion that a controlled workflow can isolate. LineBoss Filament offers materials with tight diameter tolerance, vacuum sealing with desiccant, and practical starting profiles, backed by real setup help. Get started with LineBoss Filament and print parts that hold together under load.
