Material guide
How to Dry Filament With a Dedicated Filament Dryer
From planning to printing
Find material for your next print
Compare current colors, prices, and setup requirements before choosing a spool for your project.
Share this guide
Get the article link

Quick Summary
To dry filament with a dedicated filament dryer, place the spool on the spindle so it turns freely, vent moisture as the manual directs, and set the temperature and time from the filament maker's stated limits. Check the chamber temperature with a separate thermometer, then verify the result with a test extrusion.
- Never set the dryer above the filament maker's stated maximum temperature.
- Vent the chamber as the manual directs, since sealing it traps the moisture you are removing.
- Verify the chamber temperature with a separate thermometer, because the setpoint can differ from the actual temperature.
- Listen for crackling during a test extrusion and inspect a test print for bubbling.
- Do not dry filament in a kitchen oven, which can overshoot setpoints and release fumes.
Table of Contents
- Why Filament Absorbs Moisture and Needs Drying
- Signs of Wet 3D Printer Filament to Watch For
- Setting Up Your Filament Dryer Step by Step
- 3D Printer Filament Drying Temperature and Time by Material
- How to Verify Your Filament Is Dry
- Printing Directly From a Filament Dryer
- How to Store Dried Filament Until You Print
- Frequently Asked Questions
How to Dry Filament With a Dedicated Filament Dryer
Last Updated: October 28, 2026
Why Filament Absorbs Moisture and Needs Drying
Filament is a hygroscopic material, which means it pulls water vapor out of the air over time. LineBoss Filament publishes this guide to help makers understand that moisture and deal with it before it ruins a print. Many common printing materials, including PETG, TPU, ABS, ASA, and nylon, absorb moisture more readily than others.
Moisture matters because water turns to steam inside the hot nozzle. That steam causes bubbles, popping, and rough surfaces. It can also weaken the bond between layers, so a part that looked fine on the build plate may crack under load.
Spools left open on a shelf in a humid room are the most common problem. Even vacuum-sealed packs lose their protection once opened. A dedicated filament dryer gives you a controlled way to bring a spool back to a dry state before printing.
Signs of Wet 3D Printer Filament to Watch For
Wet filament usually shows itself during printing. Watch for these warning signs:
- Crackling or popping sounds from the nozzle
- Fine bubbles or a foamy texture on the surface
- Stringing and oozing between parts of the model
- Rough or frosted surface finish
- Weaker layer adhesion, with visible gaps between layers
Stringing is a common symptom, but it has other causes too, such as retraction settings and temperature. Moisture is a likely suspect when the problem appears across several spools or gets worse as a spool sits out. For a step-by-step way to isolate the cause, see How to Stop 3D Print Stringing: Retraction & Drying Fixes.
Setting Up Your Filament Dryer Step by Step
Hands loading a spool of filament onto the spindle of a dedicated filament dryer on a clean workbench.
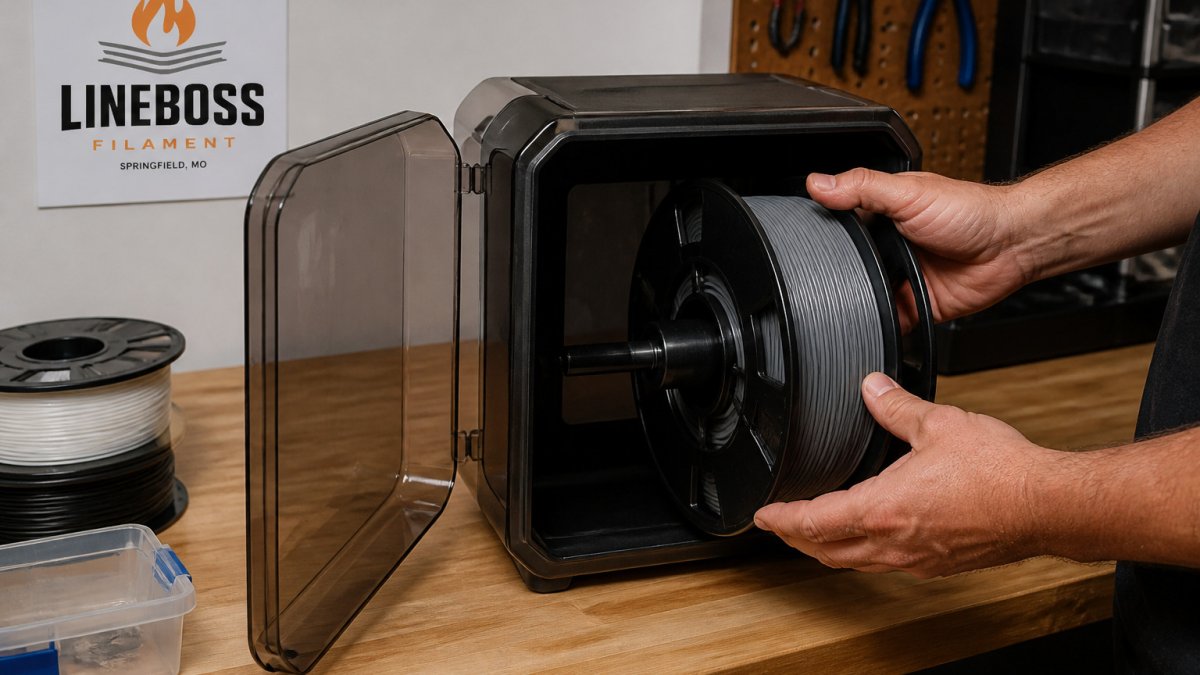
A dedicated dryer only works as well as its setup. The sequence below covers placement, spool fit, venting, and a quick calibration check so the chamber actually reaches the temperature you set. Confirm each step against your dryer manual and your filament maker's documentation before running a cycle.
- Place the dryer on a stable, level surface away from direct sunlight, drafts, and anything that could block its vents. Give the unit clearance on all sides so air can move.
- Read the dryer manual first. Note the supported spool diameters, maximum spool weight, chamber temperature range, and whether the model vents moisture passively or with a fan. These limits decide what you can safely dry.
- Check spool compatibility before loading. Measure the spool's outer diameter, hub bore, and width against the dryer's spindle and chamber. A spool that rubs the chamber wall or sits too close to the heater will dry unevenly or deform. Cardboard and some composite spools soften faster than plastic ones, so keep them within the maker's temperature limit.
- Load the spool so it turns freely. Seat it fully on the spindle, confirm the filament pays off the correct side, and make sure the spool does not contact the chamber floor or lid.
- Thread the filament through the feed port if your model supports printing from the dryer. Route it so it cannot kink, cross itself on the spool, or rub a sharp edge.
- Set temperature and time for the material using the guidance in the next section, starting from the filament maker's stated limits rather than a generic chart.
- Vent moisture as the manual directs. Most dryers need an open vent or a small gap to let humid air escape; sealing the chamber traps the water you are trying to remove. Follow the manual's venting position for drying versus printing.
- Verify chamber temperature before trusting the display. A common pattern is for the setpoint to differ from the actual chamber temperature. Use a separate thermometer rated for the range, place its probe near the spool, and compare readings after the chamber stabilizes. If the gap is large, adjust the setpoint conservatively or contact the manufacturer.
- Run the full cycle, then let the spool cool before printing or moving it to storage. Hot filament is softer and more easily deformed.
3D Printer Filament Drying Temperature and Time by Material
Drying settings are material-specific, and the safest source is always the filament maker's published limits. The table below is a framework for what to check and why, not a substitute for that documentation. Never set a dryer above the filament maker's stated maximum, and never assume a temperature that is safe for one polymer is safe for another.
| Material | Moisture Sensitivity | What to Confirm in the Maker's Documentation | Key Risk to Avoid |
|---|---|---|---|
| PLA | Lower | Maximum drying temperature and recommended cycle length; glass-transition temperature | Softening or spool deformation if dried too hot |
| PETG | Moderate | Maximum drying temperature and time; whether the maker lists a drying range | Spool warping and clumping at elevated heat |
| TPU | High | Drying temperature range and time; flexibility-related handling notes | Sticking or fusing on the spool if overheated |
| ABS | Moderate | Drying temperature and time; ventilation guidance | Warping and fume release during drying |
| ASA | Moderate | Drying temperature and time; ventilation guidance | Warping and fume release during drying |
| Nylon (PA) | High | Drying temperature and time; whether the maker recommends drying before every print | Reabsorbing moisture quickly after the cycle |
Keep these principles in mind:
- Start from the maker's maximum, then stay below it. If the documentation gives a range, begin at the lower end and extend time rather than raising temperature.
- Longer is not automatically better. Over-drying wastes time and can embrittle some materials. Stop when the verification steps in the next section show the spool is dry.
- Spool material and airflow change the time. A cardboard spool, a tightly wound spool, or a dryer with weak airflow can need more time at the same setpoint.
- Humidity and climate matter. A spool stored in a humid room may need a repeat cycle even if the timer says it is done.
- Nylon and TPU deserve extra caution. Both absorb moisture readily and are the materials most likely to need drying before every print.
After drying, use LineBoss slicer settings as a starting point for printing and adjust from there. To estimate how drying cycles affect material use and cost, see the 3D printing cost calculator.
LineBoss sells PETG, TPU, ABS, and ASA filament.


How to Verify Your Filament Is Dry
Drying is not finished just because the timer ends. Check the results before you print:
- Listen during a test extrusion. Quiet extrusion suggests less trapped moisture than crackling or popping.
- Inspect a test print. Look for a smooth surface, clean bridges, and no bubbling.
- Compare with a known-dry spool if you have one, printing the same test model with both.
- Note the storage time. Spools that have sat open for a long time may need a repeat cycle.
If the test still shows popping or surface bubbles, dry the spool again and recheck. Record your results so you can see which materials and conditions need more attention.
Printing Directly From a Filament Dryer
Some dryers let you feed filament straight from the dryer into the printer. This keeps the spool dry during printing, which helps with moisture-sensitive materials. It is most useful for long prints or humid environments.
Keep a few points in mind:
- Route the filament so it does not kink or rub against sharp edges.
- Check that the dryer's temperature stays within the material's limits during printing.
- Confirm the feed path works with your printer before starting a long job.
Drying while printing is not always necessary. For short prints with materials that are not very sensitive to moisture, drying beforehand is often enough. For PETG, a popular choice for functional parts, direct-from-dryer printing can be worth trying if you are still seeing stringing or surface problems. For a starter profile and calibration workflow, see PETG Print Settings for Beginners: A Starter Guide.
How to Store Dried Filament Until You Print
Dried filament can reabsorb moisture quickly once it leaves the dryer. Store it in a sealed container with desiccant, or keep it in its original vacuum-sealed packaging until you need it. Limit how long a spool sits out before printing.
Good storage habits include:
- Keeping spools in a dry, cool location away from sunlight
- Resealing unused filament promptly after each print
- Adding fresh desiccant to storage containers regularly
- Labeling spools with the date they were last dried
LineBoss Filament's materials are vacuum sealed with desiccant, which helps keep them dry in storage. Once a spool is opened, follow the storage practices above to keep it ready to print.
Frequently Asked Questions
How do you use a dedicated filament dryer?
Load the spool onto the dryer's spindle, route the filament through the dryer's outlet, set the temperature and time for your material, and start the cycle. Confirm the settings against your filament manufacturer's documentation and your dryer's manual before running it, since safe limits depend on both the material and the hardware. Keep the dryer on a stable surface away from flammable materials and check it periodically while it runs.
What temperature should I use to dry 3D printer filament?
The right drying temperature depends on the material and on the limits the filament maker publishes. Do not exceed the maximum temperature listed for your specific filament, and do not rely on universal numbers copied from other guides. Use the settings in the material documentation as your starting point, and adjust only within the ranges that documentation allows for your dryer.
Can I print directly from a filament dryer?
Some dedicated dryers include an outlet that feeds filament straight to the printer, which can keep material dry during a print. Whether this helps depends on your printer, your dryer's design, and the material. Check that the dryer's outlet, tubing and your printer's feed path are compatible before relying on direct feeding, and monitor the first prints to confirm the feed is steady.
How should I store filament after drying?
Keep dried spools sealed in a container with desiccant or in a dry box until you print. Remove spools from the dryer and seal them promptly, because filament can reabsorb moisture once exposed to room air. Store them in a cool, dry location away from direct sunlight.
