Material guide
How to Print Flexible TPU on a Bowden Printer
From planning to printing
Find material for your next print
Compare current colors, prices, and setup requirements before choosing a spool for your project.
Share this guide
Get the article link

Table of Contents
- Why TPU Challenges a Bowden Setup
- TPU Bowden Printer Settings: A Reproducible Starting Profile
- Mechanical Inspection Checklist for the Filament Path
- TPU Not Feeding Through Bowden Tube: Diagnosing the Cause
- TPU Filament Buckling in Extruder: Fixes That Hold
- TPU Filament Drying and Storage for Consistent Feeding
- Controlled Troubleshooting by Symptom
- Frequently Asked Questions
Last Updated: October 23, 2026
Why TPU Challenges a Bowden Setup
Flexible TPU fails on a Bowden printer because the filament travels a long, unsupported path to the hot end, and any gap between the extruder gears and nozzle lets soft filament bend instead of push. This guide from LineBoss Filament covers how to print flexible TPU on a Bowden printer without rebuilding your machine.
The fix is not a single setting. It is a combination of slower speed, reduced retraction, and a mechanically sound filament path.
Bowden Versus Direct Drive for Flexible Filament
A Bowden setup pushes filament through a tube from a remote extruder to the hot end; a direct drive extruder sits directly above the nozzle, so the filament travels only a short distance and has fewer chances to buckle.
Bowden printers can still print TPU, but they need more care in setup and slower motion. Expect slower prints and more tuning time than a direct drive machine would need.
How Shore Hardness Changes Printability
Shore hardness measures how stiff a filament is. A higher number means a harder material.
LineBoss TPU filament is rated at 95A +/-2 shore hardness, which balances elasticity with enough stiffness to feed through a tube. Softer TPU grades bend more easily inside a Bowden path and demand even slower speeds.

Harder grades feed more predictably. If a print keeps failing, check the shore rating on the spool before blaming the printer.
TPU Bowden Printer Settings: A Reproducible Starting Profile
Build a reproducible TPU Bowden profile in a fixed order: establish a clean feed, set a conservative speed ceiling, then tune temperature, flow, and finally retraction.
Treat every value below as a starting point tied to your hardware. Confirm the temperature range on your spool or the material maker's documentation, and never print below the maker's stated minimum, because layer adhesion drops and the part delaminates.
Speed: Set a Ceiling, Then Validate
Bowden TPU speed is limited by how much push force the filament can take before it buckles, not by the motion system. Start at a conservative fraction of your established PLA speed and raise it only after a test print shows no gaps, no clicking, and no filament deformation at the extruder.
- Start slow enough that the extruder never audibly labors.
- Increase in small increments between test prints.
- Stop at the first sign of clicking, grinding, or under-extrusion, then back off one step.
Outer walls and top surfaces usually need a lower speed than infill. Many slicers let you set a separate outer-wall speed; use it to keep visible surfaces clean while allowing slightly faster infill.
Temperature: Stay Inside the Maker's Window
Nozzle temperature for TPU is set by the material maker, not by a universal number. Print in the middle of the stated range as a baseline, then move toward the upper end if layer adhesion is weak and toward the lower end if stringing and oozing dominate. Bed temperature follows the maker's guidance and mainly affects first-layer grip.
Flow: Tune After Speed and Temperature
Flow rate on a Bowden TPU profile is usually set slightly below the slicer default to counter over-extrusion and blobbing, but the correct value depends on your extruder's effective steps and the filament diameter. Calibrate with a single-wall test print, measure wall thickness, and adjust in small increments.
Retraction: Start Disabled, Add Back in Steps
Retraction is the setting most likely to cause Bowden TPU failures: long, fast retractions pull soft filament into gaps and can grind or snap it. Start with retraction disabled. If stringing is unacceptable, add a very short distance and a slow speed, then test after each change. There is no universal retraction number: distance and speed depend on your extruder, hot end, and tube length, so tune on your own machine.
Slicer-Specific Anchors
Slicer interfaces differ, but the settings that matter are consistent. In most slicers you will find:
- Print speed and a separate outer wall speed under the speed settings.
- Retraction distance and retraction speed under the extruder or retraction tab.
- Flow or extrusion multiplier under material or filament settings.
- Nozzle temperature for the first layer and other layers, set separately in many profiles.
Set these deliberately rather than accepting defaults carried over from a PLA profile. The LineBoss slicer settings resource walks through material-specific starting profiles you can adapt.
A Short Calibration Sequence
- Confirm the filament path is clean and the tube is fully seated (see the inspection checklist below).
- Print a small test cube at a conservative speed with retraction disabled.
- If walls show gaps, adjust flow in small steps and re-test.
- If layer adhesion is weak, raise nozzle temperature within the maker's range.
- Only after steps 1-4 are stable, add minimal retraction if stringing requires it.
- Record each change and its result so the profile is repeatable on the next spool.
Mechanical Inspection Checklist for the Filament Path
A clean, tight filament path does more for TPU than any slicer tweak. Flexible filament buckles wherever the path gives it room to bend, so find and close every gap, sharp bend, and loose joint between the extruder gears and the nozzle before changing settings.
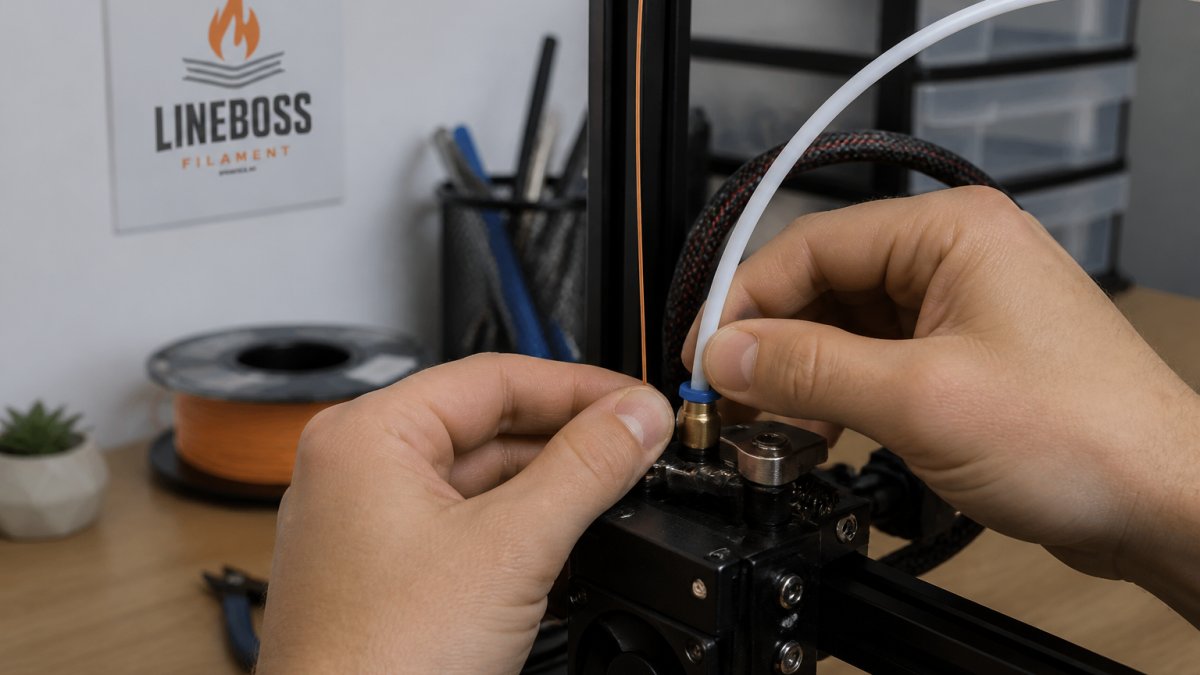
What to Inspect and What Failure Looks Like
- Tube seated fully into both the extruder fitting and the hot end coupler. Failure looks like a tube that can be pulled out by hand or sits proud of the fitting, leaving an internal gap where soft filament folds.
- Coupler clips installed so the tube cannot back out under pressure. Failure looks like a missing or cracked clip, or a tube that creeps forward during retraction, opening a gap that TPU fills.
- No tube damage such as kinks, cracks, or a worn inner wall. Failure looks like a visible kink, a flattened section, or a rough interior that drags on the filament and raises friction and back pressure.
- Tube clearance correct for 1.75mm filament, with no excess slop. Failure looks like a noticeably oversized bore, which lets the filament buckle sideways inside the tube instead of pushing forward.
- Extruder tension set so gears grip without flattening the filament. Failure looks like a flattened or chewed section after a test feed. Too little tension lets the filament slip; too much grinds it into a flat spot that will not feed.
How to Check the Path
With the hot end heated to the material maker's printing temperature, release the extruder tension and push filament through by hand. You should feel steady resistance, not a catch or a sudden give.
Then run the extruder motor briefly with no nozzle restriction and watch the filament at the gears. If it curls or bends at the gear entry, the problem is upstream of the tube.
Why This Matters More for TPU
Rigid filament tolerates small gaps because it resists bending. Flexible filament does not: any clearance becomes a buckling point once push force rises. That is why a printer that prints PLA perfectly can fail on TPU with no slicer change at all. Closing gaps and removing sharp bends is the highest-leverage fix available on a Bowden machine.
TPU Not Feeding Through Bowden Tube: Diagnosing the Cause
When TPU is not feeding through the Bowden tube, the cause is usually a gap at a fitting, too much extruder tension, too fast a feed rate, or a blocked tube. Work through them in that order, starting by watching the filament at the extruder while the printer runs.
Check these in sequence:
- Confirm the tube is fully seated at both ends.
- Reduce print speed and watch again.
- Loosen extruder tension slightly and retest.
- Remove the tube and push filament through by hand to feel for drag.
- Clear any partial clog at the hot end.
If the filament grinds into a flat spot, cut off the damaged section before retrying. A flattened end will not feed reliably.
TPU Filament Buckling in Extruder: Fixes That Hold
TPU filament buckling in the extruder happens when the push force exceeds what the soft filament can resist. The filament folds inside the extruder instead of moving forward.
Three fixes hold up in practice:
- Slow down. Lower speed reduces back pressure at the nozzle.
- Shorten the path. Move the spool close to the extruder and remove sharp bends.
- Support the filament. Add a guide between spool and extruder so the strand enters straight.
Also check for partial clogs. A clog raises pressure, and pressure is what causes buckling. Clearing the nozzle often solves what looks like an extruder fault.
TPU Filament Drying and Storage for Consistent Feeding
Moisture changes how TPU feeds and prints: damp filament pops, foams, and strings, and those defects get worse on a slow Bowden setup.
LineBoss TPU ships in sealed vacuum packing with desiccant. Once the bag is open, store the spool in an airtight container with fresh desiccant.
Dry filament using a dedicated filament dryer set to the temperature your material maker specifies, following the maker's time and temperature guidance rather than guessing. Check the spool before a long print: if the surface feels tacky or the print pops at the nozzle, dry it first. Consistent filament means consistent extrusion, which matters more with flexible material than with PLA.
Controlled Troubleshooting by Symptom
Troubleshoot one variable at a time. Changing speed, retraction, and temperature together hides which fix actually worked.
| Symptom | Likely Cause | First Fix |
|---|---|---|
| Filament folds at gears | Too much back pressure | Slow down, check for clogs |
| Gaps in walls | Under-extrusion | Raise flow slightly, check tension |
| Heavy stringing | Retraction too low or too slow | Add small retraction steps |
| Grinding noise | Extruder tension too high | Loosen tension, trim damaged filament |
| Poor layer adhesion | Nozzle too cool | Raise temperature within maker's range |
| Rough surface finish | Moist filament | Dry the spool, reseal with desiccant |
For budgeting material and print time, the LineBoss cost calculator helps estimate what each part actually costs.
For background on how flexible filament behaves, Filamentive's guide to flexible filament covers material basics, and All3DP's TPU printing overview explains common print issues.
TPU on a Bowden printer rewards patience over power.
Frequently Asked Questions
Can a Bowden extruder print flexible TPU?
Yes, but it needs a slower, more controlled approach than rigid filament. The long tube between the extruder and hot end gives soft filament room to buckle, so you print slower, cut or disable retraction, and keep the filament path tight. A 95A TPU like LineBoss TPU is the practical starting point on most Bowden machines. Harder TPU grades feed more reliably, while very soft grades often need a direct-drive extruder.
What print speed should I use for TPU on a Bowden printer?
Start slower than you would for PLA and treat the number as a variable to tune, not a fixed rule. Many Bowden setups run TPU in the 20-30 mm/s range for perimeters, then raise speed only if extrusion stays consistent. Watch for under-extrusion, gaps, or the extruder clicking. If those appear, drop speed before changing anything else. Your hot end, nozzle size, and filament hardness all affect the ceiling.
Why is my TPU not feeding through the Bowden tube?
The usual causes are a gap between the tube and nozzle, a loose tube fitting, too much extruder tension, or filament that has absorbed moisture. Check that the tube seats fully against the nozzle, the coupler grips the tube, and the extruder gear bites without flattening the filament. Dry the spool if it has been exposed to humid air. LineBoss TPU ships vacuum sealed with desiccant, so store it sealed between prints.
Should I use retraction when printing TPU with a Bowden extruder?
Reduce it heavily or turn it off. Long retractions pull soft filament through a long tube and often cause buckling, grinding, or jams. If stringing is a problem, try a short retraction distance and low speed first, and rely on lower nozzle temperature and faster travel moves where your machine allows. Test one change at a time on a small print so you can tell which adjustment helped.
