Material guide
7 Reasons Your 3D Prints Are Brittle and How to Fix Them
From planning to printing
Find material for your next print
Compare current colors, prices, and setup requirements before choosing a spool for your project.
Share this guide
Get the article link

Last Updated: November 7, 2026
Quick Summary
Brittle 3d prints almost always trace back to wet filament, low printing temperature, too much cooling, poor layer bonding, or a clogged nozzle. Dry the filament first, then change one setting at a time and print a test part before adjusting temperature, flow, or cooling.
- Bend a short length of filament in your hand to tell brittle filament from brittle printed parts.
- Wet filament is the most common cause, and PLA picks up moisture fastest and loses toughness.
- Dry PLA around 40-45 °C for 4-6 hours, staying at or below the maker's published settings.
- Adding one or two extra perimeters often strengthens parts more than any slicer tweak.
- Keep spools sealed with fresh desiccant and label them with the open date.
Table of Contents
- Why Brittle 3D Prints Happen: Start With a Symptom Check
- Moisture and Wet Filament: The Most Common Cause
- How to Fix Brittle PLA Filament With One Variable at a Time
- 3D Print Layer Adhesion: Why Layers Split and Crack
- Temperature, Cooling, and Extrusion Settings That Weaken Parts
- When a Filament Dryer Solves the Problem
- PLA Brittle After Printing: Storage and Material Age
- Build a Stronger Baseline With LineBoss Filament
- Frequently Asked Questions
Why Brittle 3D Prints Happen: Start With a Symptom Check
Brittle 3D prints almost always trace back to one of a few causes: wet filament, low printing temperature, too much cooling, poor layer bonding, or a clogged nozzle. Finding the right cause matters more than guessing, because each fix is different. This guide from LineBoss Filament walks through a symptom-first check so you stop changing five settings at once.
The first question to answer: is the filament itself brittle, or is the finished part brittle? Those are two different problems with two different fixes. Makers who mix them up usually waste a full spool chasing the wrong cause.
Snapping Filament vs. Weak Printed Parts
Brittle filament snaps or cracks on the spool or in the feed path before it ever reaches the nozzle. Brittle printed parts come off the bed looking fine, then crack along layer lines under light load.
Check the spool first. Bend a short length of filament in your hand. If it snaps clean with little flex, the material is the problem. If it bends and only the printed part fails, the issue sits in your print settings or part design.
Moisture and Wet Filament: The Most Common Cause
Wet filament is the most common reason prints turn brittle. Plastic absorbs moisture from the air, and that water turns to steam inside the hot end. The steam creates tiny air pockets and gaps between lines, so layers never fully bond.
Signs of wet filament include:
- Popping or crackling sounds while printing
- Visible steam or small bubbles at the nozzle
- A rough, matte surface where you expect gloss
- Parts that snap instead of bending
PLA is the worst offender. It picks up moisture fast and loses toughness as it does. A dry box with fresh desiccant slows this down, but it cannot reverse absorption that has already happened.
How to Fix Brittle PLA Filament With One Variable at a Time
Change one setting per test print. That single rule separates a fast fix from a week of guessing. If you adjust temperature, flow, and cooling together, you will never know which change helped.
Use this order:
- Dry the filament first. Wet filament makes every other setting look wrong.
- Print a temperature tower. Find the range where layers bond without stringing.
- Run an extrusion calibration. Check flow rate and e-steps so lines meet cleanly.
- Adjust cooling after that. Reduce fan speed and re-test.
- Change one thing, then print again. Keep notes on each run.
A common mistake is skipping step one. No temperature or flow change will fix filament that is still wet.
3D Print Layer Adhesion: Why Layers Split and Crack
Weak layer bonding is the most visible sign of brittle 3D prints. Parts crack cleanly along layer lines because each layer cooled before the next one fused to it. Strong layer adhesion depends on temperature, flow, and cooling working together.
Watch for these clues:
- Cracks that follow layer lines exactly
- Gaps between lines on top surfaces
- Parts that split when flexed, not when dropped
Wall thickness and shell width also matter. Thin walls flex less and crack sooner. Adding one or two extra perimeters often does more for strength than any slicer tweak. For a deeper walkthrough of temperature, cooling, and drying fixes, see how to improve layer adhesion on your 3D prints.
Temperature, Cooling, and Extrusion Settings That Weaken Parts
Low nozzle temperature is a frequent cause of brittle parts. Plastic that prints too cool never melts fully into the layer below. The result is a part that looks complete but bonds poorly.
Cooling fan speed is the other half of the story. Excessive cooling freezes each layer too fast, which drops layer bonding and raises the chance of cracking. Large parts and high-fan profiles are the usual suspects.
Extrusion problems round out the list:
- Under-extrusion leaves gaps and air pockets between lines
- A clogged nozzle restricts flow and causes thin, weak walls
- Inconsistent extrusion shows up as banding and weak spots
- A worn or dirty hot end makes flow uneven
Start with the material maker's temperature range and stay inside it. LineBoss publishes practical starting profiles with each spool, and the PLA filament temperature guide for beginners is a good baseline before you tune further.
When a Filament Dryer Solves the Problem
A filament dryer solves the problem when moisture is the confirmed cause. If your filament pops, steams, or snaps on the spool, drying is the fix. If the spool is dry and parts still crack, drying will not help, go back to the bend test and the break-surface clues in the first section before spending time on a dry cycle. Before buying, the filament dryer buyer's guide covers the factors that decide moisture-free prints.
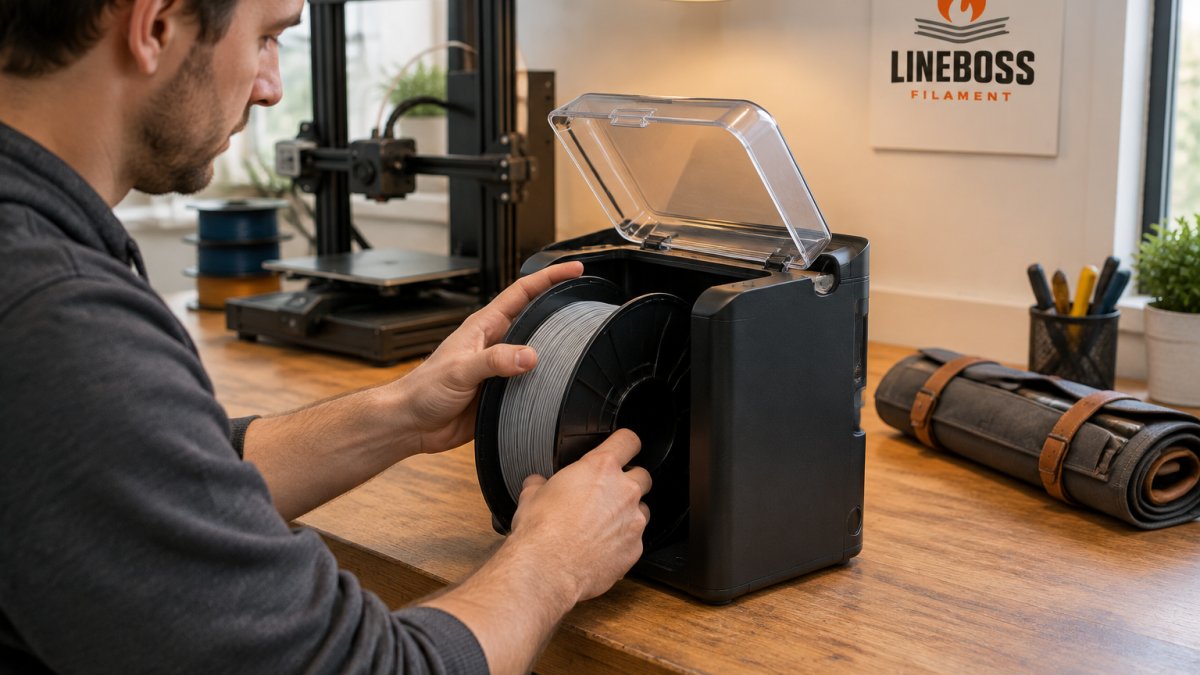
How a Dryer Actually Removes Moisture
A filament dryer works by holding the spool at a steady, elevated temperature while moving air carries the released water vapor away. Two things matter: the temperature must stay below the point where the filament softens enough to fuse on the spool, and the enclosure needs a way for moist air to escape. A sealed box with heat but no vent will reach equilibrium and stop drying. Desiccant in a dry box is a holding strategy, not a drying strategy, it slows uptake on a dry spool but will not pull meaningful moisture out of a wet one at room temperature.
Material-Specific Drying Targets
Use the filament maker's published drying temperature and time as your baseline, and stay at or below them. The ranges below are typical starting points, not universal settings, always defer to the spool label or the maker's technical data sheet.
- PLA, dries at the low end of the range, typically around 40-45 °C for 4-6 hours. PLA softens and deforms on the spool if overheated, so err low.
- PETG, typically around 60-65 °C for 4-6 hours. More heat-tolerant than PLA but still prone to spool deformation at the upper end.
- ABS and ASA, typically around 70-80 °C for 4-8 hours. These tolerate higher drying temperatures, but check the spool material; some cardboard and recycled spools warp before the filament does.
- Nylon (PA), the most hygroscopic common material. Typical guidance is around 70-80 °C for 8-12 hours, and nylon may need re-drying before every long print.
- TPU, typically around 50-60 °C for 4-6 hours. Flexible filament absorbs moisture readily and prints poorly when wet.
Never dry filament in a kitchen oven.
When Drying Will Not Help
If a dried spool still snaps in the bend test, check its open date and storage history. If a dry spool still produces parts that split on layer lines, the cause may lie in temperature, cooling, or flow settings rather than moisture.
For the settings that interact with drying, first-layer temperature, cooling ramp, and flow, see the slicer settings resource. To weigh the cost of drying versus replacing a spool, the 3D printing cost calculator is a useful sanity check.
Use the filament maker's published drying temperature and time as your baseline, and stay at or below them.
| Material | Typical drying temperature | Typical drying time |
|---|---|---|
| PLA | Around 40-45 °C | 4-6 hours |
| PETG | Around 60-65 °C | 4-6 hours |
| ABS and ASA | Around 70-80 °C | 4-8 hours |
| Nylon (PA) | Around 70-80 °C | 8-12 hours |
| TPU | Around 50-60 °C | 4-6 hours |
Typical drying time
PLA Brittle After Printing: Storage and Material Age
PLA that turns brittle after printing usually sat exposed to humidity for weeks. Storage, not the printer, is the culprit. Material age matters too: old filament and poorly sealed spools absorb moisture and lose toughness over time.
Storage rules that work:
- Keep spools in a sealed container with fresh desiccant
- Reseal partial spools the same day you open them
- Store away from heat, sunlight, and damp rooms
- Label spools with the open date
- Dry a spool before a long or load-bearing print
Filament quality also plays a part. Manufacturing defects, contamination, and inconsistent diameter all weaken extrusion. A spool with tight diameter tolerance feeds more evenly, which means fewer weak spots in the finished part.
Build a Stronger Baseline With LineBoss Filament
LineBoss Filament lists +/-0.02mm diameter tolerance and vacuum sealing with desiccant on its spools, and includes material starting settings with its filament.
For parts that need to flex before they break, LineBoss PLA+ Filament uses an impact-modified formula that bends slightly instead of snapping. It keeps the beginner-friendly printing behavior of standard PLA while adding toughness for functional parts and cosplay builds. PETG and ABS cover higher-impact and higher-heat jobs.

Dry one spool, change one setting at a time, and print a test part before your next big job.
Frequently Asked Questions
Why are my 3D prints coming out brittle?
Brittle 3D prints usually come from one of a few causes: filament that has absorbed moisture, printing temperatures that are too low for the material, weak layer adhesion from cooling or speed settings, or under-extrusion leaving gaps inside the part. Filament quality and age matter too, since degraded or contaminated material snaps more easily. Diagnose one variable at a time: dry the spool, then check temperature, then flow and cooling, so you know which change actually fixed the brittleness.
Can wet filament make 3D prints brittle?
Yes. Moisture absorbed into filament turns to steam at the nozzle, which creates inconsistent extrusion, air pockets, and weaker bonds between layers. The printed part looks fine on the surface but snaps or cracks under load. Store spools in a sealed container between prints to slow reabsorption.
How can I tell whether brittle prints are caused by filament or print settings?
Print a small test part with a freshly dried spool and your current profile. If it still snaps, the problem is in settings, not moisture. Next, raise nozzle temperature slightly within the material maker's range and reprint. If strength improves, temperature was the cause. If nothing changes, check flow rate and layer adhesion by examining the break: clean splits between layers point to cooling or temperature, while rough, gappy breaks point to under-extrusion.
Do PLA prints get brittle over time?
PLA can become more brittle as it ages, especially if it is stored in humid conditions or exposed to heat. The polymer absorbs moisture and slowly degrades, and spools left open for months often snap when bent. Prints themselves also weaken with prolonged UV and heat exposure. Sealed storage with desiccant and drying before use keeps PLA predictable, and using a spool within a reasonable window avoids the problem entirely.
