Material guide
How to Reduce Filament Waste in High-Volume 3D Printing
From planning to printing
Find material for your next print
Compare current colors, prices, and setup requirements before choosing a spool for your project.
Share this guide
Get the article link

Quick Summary
Reduce filament waste in high-volume 3D printing by targeting its main sources: purge and flush material, supports, excess infill, and failed prints. Test purge volume on each printer and material pair, orient parts to need fewer supports, use the lowest infill that meets the load, and keep nozzles, filament, and calibration in check.
- Weigh a sample of prints to record grams used by each waste source before changing anything.
- Increase purge volume in small steps until color transitions are clean, then record the value per printer and material pair.
- Group parts by color to run single-color batches, which removes purge transitions entirely.
- Rotate parts to reduce overhangs that need support material.
- Use the lowest infill that still meets load and finish needs, and log failures to catch patterns early.
Table of Contents
- Where Filament Waste Comes From in High-Volume Printing
- How to Reduce Purge Waste in Multi-Color 3D Printing
- Cutting Supports and Infill With Model Orientation and Slicer Settings
- How to Reduce Failed 3D Prints Through Calibration and Maintenance
- Tracking Filament Waste and Cost per Part Across a Print Farm
- Setting Up Your Next Batch to Waste Less Filament
- Frequently Asked Questions
How to Reduce Filament Waste in High-Volume 3D Printing
Last Updated: October 30, 2026
Where Filament Waste Comes From in High-Volume Printing
Filament waste adds up fast in a print farm. A few grams lost per part can turn into a large monthly cost across ten printers running every day. This guide starts with where the waste actually comes from.
The main sources are purge and flush material, support structures, infill that is heavier than the part needs, and failed prints. Each one looks small on its own. Together they often account for a large share of the spool.
Here is a quick view of where to look first:
| Waste Source | What Causes It | Where to Check |
|---|---|---|
| Purge and flush | Color changes and nozzle cleaning | Slicer purge settings |
| Supports | Overhangs and poor orientation | Model orientation |
| Excess infill | High density on non-load parts | Infill settings |
| Failed prints | Calibration drift, moisture, clogs | Print logs and maintenance |
Start by weighing a sample of prints and noting the grams used for each source. That baseline makes every later change easier to measure.
How to Reduce Purge Waste in Multi-Color 3D Printing
In multicolor work, purge and flush material can be a major source of waste, and in a print farm it scales with every color change on every plate. The goal is not the smallest possible purge number; it is the smallest purge volume that still produces a clean color transition on your specific printer, nozzle, and material pair. Treat every value below as a starting point to test, not a setting to copy.
What actually drives purge volume
Purge volume is a function of the melt zone and hotend geometry, nozzle diameter, the two colors being swapped (light-to-dark and dark-to-light behave differently), and the material family. A larger melt zone and a wider nozzle hold more residual material, so they generally need more purge to clear. Pigment load matters too: opaque whites and light colors usually need more flushing to hide a darker predecessor than the reverse. Because these factors interact, a purge value that works on one machine can bleed on another with the same filament.
Optimizing purge towers and extrusion volume
Purge towers and purge lines exist to clear the nozzle, so their volume is waste unless you can put it to work. Work through this loop on each printer and material pair:
- Start from the slicer's default purge volume for the color pair and print a small test coupon that includes the transition.
- Inspect the transition under consistent lighting for bleed, streaks, or a visible seam.
- Increase purge volume in small increments until the transition is clean, then record that value against the printer, nozzle, and material pair.
- Reuse the recorded value only for that same combination, and re-test after any nozzle, hotend, or material change.
A few practical levers reduce purge without risking color quality:
- Wipe and prime tuning. Nozzle wipe distance and prime amount affect how much residual color remains; adjust these alongside purge volume rather than in isolation.
- Group color changes. Ordering layers and plates so similar colors run together reduces the number of transitions per batch.
Results depend on your printer, nozzle, and materials, so test each setup rather than copying numbers from another machine. The slicer settings guide is a useful reference for locating the purge, wipe, and prime controls in common slicers.
Choosing single-color runs or splitting models across plates
Single-color runs produce no purge waste at all, so when an order allows it, group parts by color and run them as separate batches. This removes transitions entirely rather than shrinking them.
Splitting a model across plates can also cut waste. Smaller parts often need fewer supports and leave less unused space on the bed, and separating colored components lets you run each in its own single-color batch. Check that each piece still fits its intended use and that assembly tolerances survive the split before you commit a production run.
A production-scale purge workflow
In high-volume work the win comes from consistency, not from a single clever setting. Keep a purge log keyed to printer, nozzle, and material pair; store verified values in reusable slicer profiles; and re-verify after maintenance that touches the hotend. When you plan a batch, count the color transitions per plate and prefer plate layouts that minimize them. That combination, verified per-machine values plus transition-aware batching, is what separates a farm that controls purge waste from one that keeps re-testing the same settings.
Cutting Supports and Infill With Model Orientation and Slicer Settings
Supports are one of the easiest losses to reduce. Rotating a part so fewer overhangs need support can remove a large amount of material without changing the design.
Infill matters too. Many parts are printed at higher density than they need. Use the lowest infill that still meets the load and finish requirements for each part. Functional parts may need more infill, while display pieces often need very little.
Layer height also affects material use. Taller layers print faster and can reduce the total material in some designs, but they may reduce detail. Test the tradeoff on a sample part first.
How to Reduce Failed 3D Prints Through Calibration and Maintenance
Failed prints waste filament twice: the material that was used and the time to reprint. Most failures trace back to a few causes, including clogged nozzles, moisture in the filament, and drifting calibration.
Start with a routine check:
- Inspect the nozzle for partial clogs and clean it when needed.
- Confirm the bed is level before each batch.
- Store filament sealed with desiccant, and dry it when it has absorbed moisture.
- Keep a log of failures so patterns show up over time.
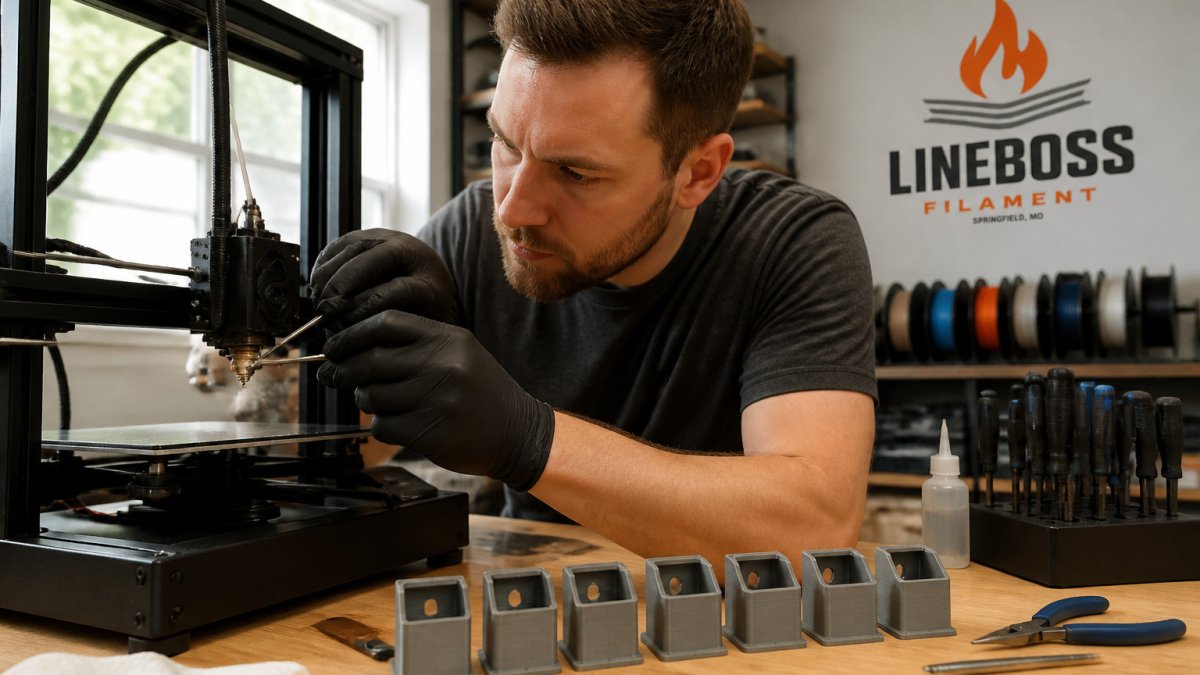
A maker can spot a partly clogged nozzle by checking the extrusion line and clearing it carefully with a fine needle.
!A maker in a workshop carefully inspecting a 3D printer nozzle with a fine needle beside a row of printed parts on a bench
Dedicated filament dryers are one option for moisture control. Keep drying guidance tied to the material maker's limits, since temperatures that suit one filament can damage another.
Tracking Filament Waste and Cost per Part Across a Print Farm
Most guides stop at "track your waste." For a print farm the useful question is narrower: which changes actually reduced waste per good part, and by how much? That requires a repeatable measurement method, not a spreadsheet of guesses. This section lays out a baseline-and-verify workflow you can run without inventing numbers, you supply the measurements, the method supplies the structure.
Build a baseline before you change anything
Pick a representative batch and record, per plate and per part:
- Filament issued, grams loaded for the batch, from spool weight or slicer estimates you have verified against a scale.
- Purge and flush mass, grams the slicer attributes to purge towers, purge lines, and wipe/prime, where the slicer reports it.
- Support mass, grams attributed to support structures.
- Failed-print mass, grams consumed by parts that did not pass inspection, plus the material used to reprint them.
- Good parts produced, the count that passed your quality check.
From those, compute two ratios that make batches comparable: waste percentage (total non-part mass divided by filament issued) and grams per good part (filament issued divided by good parts). Keep the raw numbers so you can re-derive the ratios if your definition changes.
Attribute savings to specific changes
Change one variable at a time, purge volume, orientation, infill, or a maintenance step, and re-measure the same ratios on a comparable batch. If you change several things at once, you cannot tell which one moved the number. A common pattern is that purge and failure-rate changes show up quickly in grams per good part, while orientation and infill changes show up more slowly because they depend on part geometry.
Turn measurements into cost per part
Once you have grams per good part, combine it with your material cost and machine time to get a cost per part you can compare across batches. Use the 3D printing cost calculator to build batch estimates that include material, machine time, and labor, then compare those estimates against your measured ratios. The gap between estimate and measurement is itself useful: it tells you where the model is missing waste.
Review cadence and what to watch
Review the log weekly and look for trends rather than single-batch noise: rising failure mass often points to calibration drift or moisture, while rising purge mass often points to a material or color-pair change. Keep the log keyed to printer and material so a regression on one machine does not get averaged away across the farm. Over time, the log becomes the evidence base for which waste-reduction changes are worth rolling out to every machine.
Setting Up Your Next Batch to Waste Less Filament
Before the next batch, review your purge settings, orientation, infill, and maintenance checklist. Group color changes together and split models where it makes sense.
If you run a print farm, plan your material needs in advance so you are not mixing spools and colors at the last minute. Planning ahead can simplify batch setup. For questions about your operation, you can visit LineBoss Filament.
Frequently Asked Questions
How much filament does purge waste use? Purge waste depends on your printer, nozzle, and color pairs. Test your own setup, starting with a small purge volume and increasing it until colors stay clean.
Does changing infill reduce filament use? Yes. Lower infill uses less material on parts that do not carry heavy loads. Functional parts may still need higher density.
What causes most failed prints? Common causes include clogged nozzles, moisture in the filament, and calibration drift. Regular maintenance and a failure log help catch these early.
Frequently Asked Questions
How can you reduce filament waste in high-volume 3D printing?
The biggest gains usually come from four areas: cutting purge and flush volume in multi-color jobs, reducing support material through model orientation, lowering infill where the part allows it, and cutting failed prints through regular calibration and nozzle maintenance. Track grams used per part in each batch so you can see which change actually saves material. Results depend on your printer, slicer and material, so test each change on a small batch before rolling it out across the farm.
Can purge material be reused in 3D printing?
Purge material can sometimes be collected and reprocessed, but it is usually mixed colors and may contain contamination, so its quality is not reliably predictable. Many operators keep purge waste separate and send it to a recycling program or reuse it only for non-critical prototypes. Check your material maker's guidance before reprocessing any filament, because recycled material can behave differently when printed.
How should a print farm track filament waste?
Weigh each spool before and after a batch, record the grams consumed, and log the failed and purged material separately. Compare grams per finished part across print jobs to measure cost per part. A simple spreadsheet is enough to start, and the slicer's estimated filament use can serve as a baseline you check against actual weights.
How can slicer settings reduce filament use without weakening a part?
Lower infill only on parts that carry no significant load, and use a higher infill percentage where strength matters. Adjust wall count, support density and support placement to remove unnecessary material, and reduce purge volume where your slicer and printer allow it. Test critical parts after each change, since the right balance depends on the part's function and your hardware.
